

How to Make a Latte at Home Like a True Barista
If you’ve ever wondered how to make a latte, it's simpler than you might think. At its heart, it’s a beautifully balanced drink made by pouring perfectly steamed milk over a shot of rich espresso. Get those two things right, and you’re well on your way to crafting a café-quality coffee in your own kitchen or office.
Your Gateway to Barista-Quality Coffee
Welcome to the art of the perfect latte. This isn’t just about mixing coffee and milk; it's about creating a moment of comfort that can completely reset your day. We’re going to demystify the process and show you that a beautiful, velvety latte is a skill anyone can master.
The whole journey starts with two essential pillars:
- A rich, balanced espresso shot: This is your flavour foundation. It provides the depth and character that cuts through the creamy milk.
- Perfectly steamed, silky milk: This is what gives the latte its signature luxurious texture and brings out a subtle, natural sweetness.
More Than Just a Drink
Once you get a feel for these two elements, you’re set. This guide is here to help you see latte making not as a chore, but as a rewarding ritual that elevates your daily coffee. And that's a ritual with a big impact, especially in the workplace.
A great latte fosters connection and fuels creativity. It’s a small luxury that can make a big difference in team morale and individual focus throughout the workday.
Think about the modern UK office, where the sound of steaming milk often signals a moment for a quick chat or a bit of collaboration. It's no surprise that a remarkable 25% of the UK's total coffee consumption happens right at work or while studying. Lattes aren't just drinks; they’re a catalyst for connection.
In fact, an incredible 81% of employees report stronger bonds with their colleagues over coffee breaks, and 67% feel more productive after their coffee ritual. You can find more insights into UK coffee culture and its workplace impact here.
Ultimately, learning to make a great latte is about empowering yourself to create small moments of joy—whether it's just for you at home or for the whole team at the office.
Assembling Your Essential Latte Toolkit
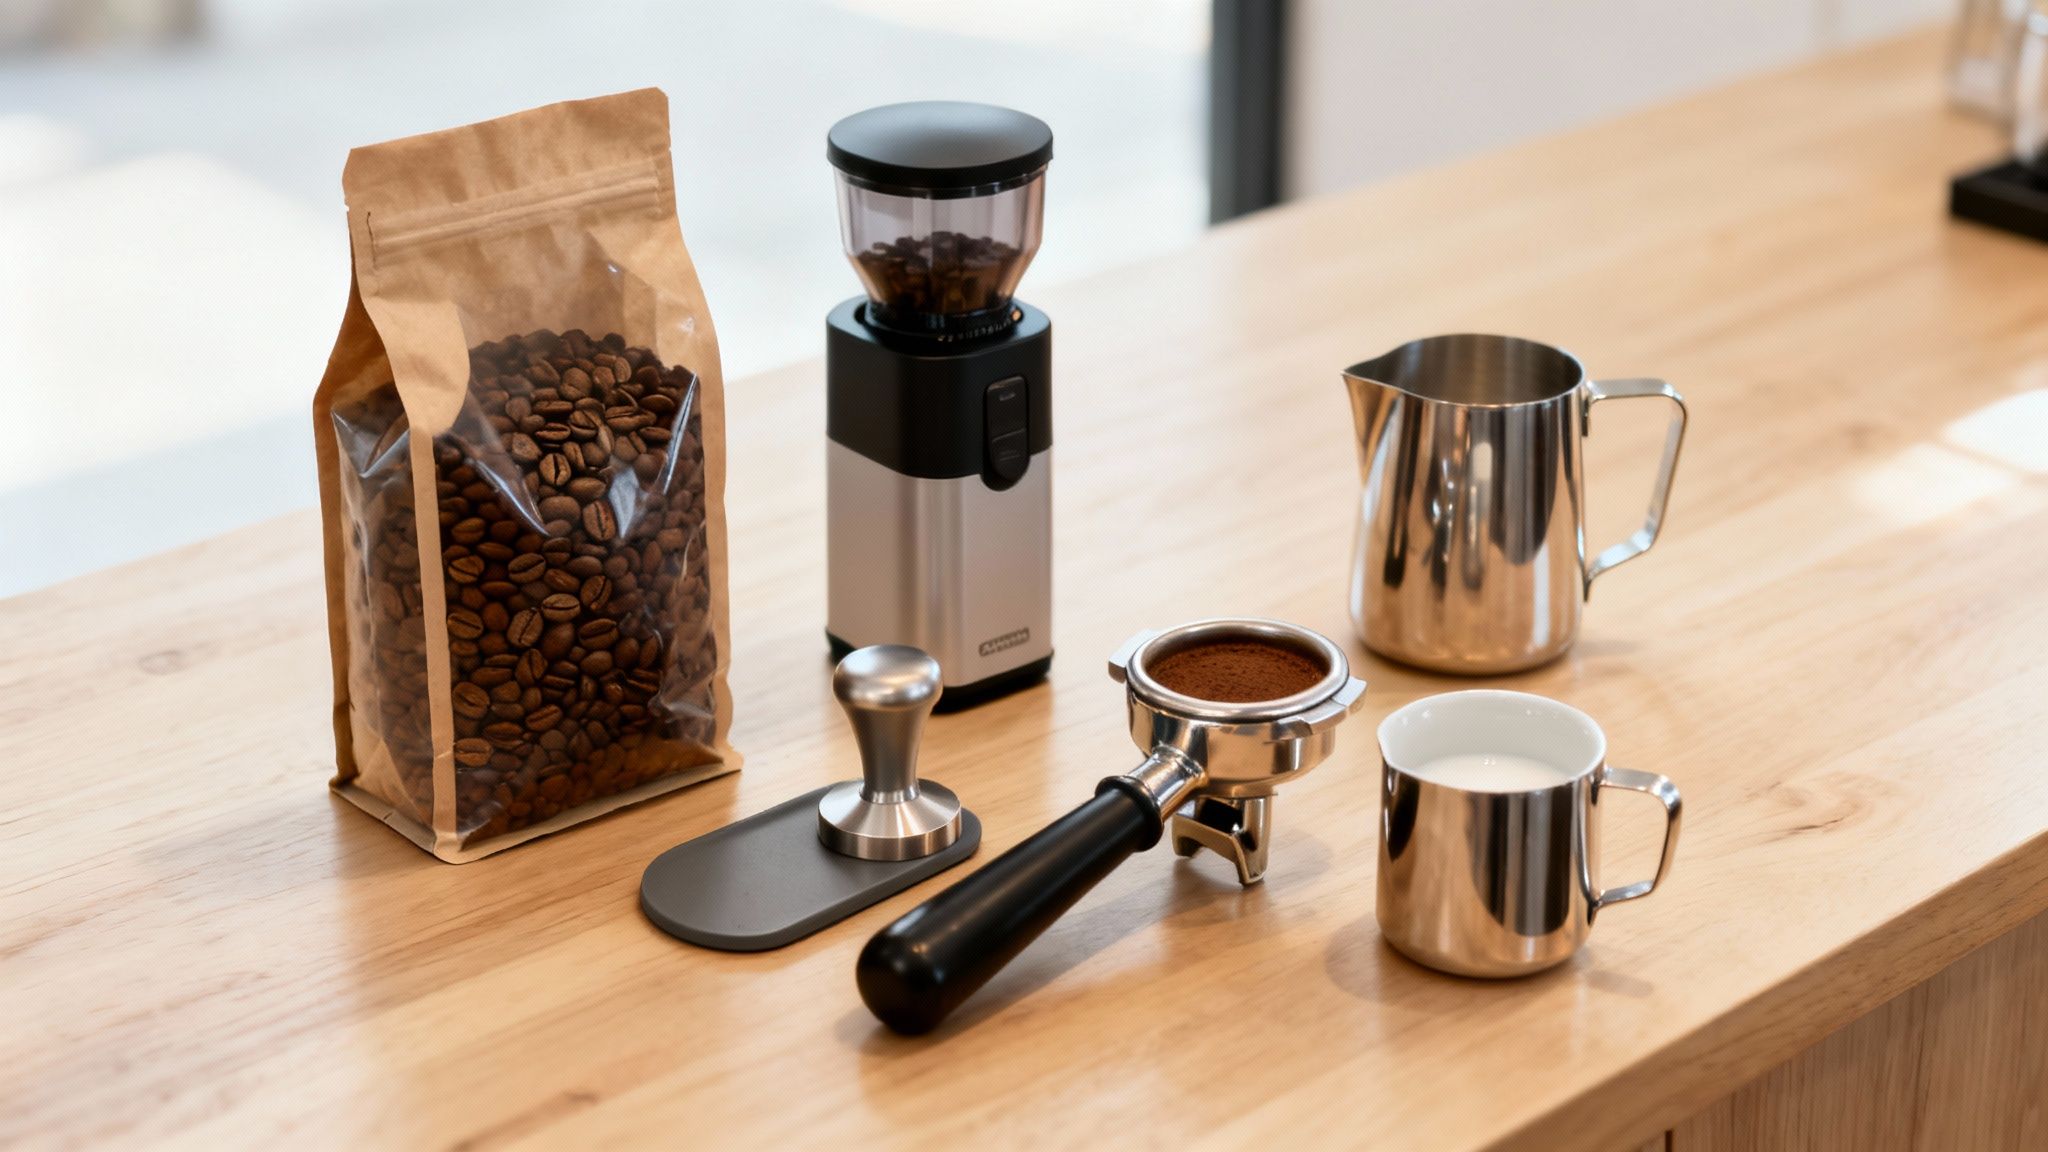
Before you can pull that first perfect shot, you need to gather your tools. The quality of your kit and ingredients directly shapes the final character of your latte, turning a simple drink into something memorable. Think of it as setting the stage for a great performance; every single element plays a crucial part.
The journey to an amazing latte always starts with the coffee itself. It’s the heart of the drink, providing all the deep, complex flavours that the milk is there to complement, not overpower.
Choosing Your Core Ingredients
Your choice of coffee beans is non-negotiable for a flavourful espresso. Always look for beans that have been roasted recently. Freshness is absolutely key to preserving the aromatic oils that create a rich taste and that beautiful, stable crema we’re all chasing.
When it comes to the other half of the equation—the milk—you have plenty of options, each bringing a unique quality to the cup.
What you put into your latte directly impacts what you get out of it. Here’s a quick rundown of the essentials.
Your Latte Ingredients and Their Purpose
| Component | What to Look For | Why It Matters |
|---|---|---|
| Coffee Beans | Freshly roasted, medium-to-dark roast profile is a classic choice for lattes. | Freshness preserves volatile oils, creating a rich flavour and a thick crema that stands up to milk. The roast profile determines the coffee's core flavour notes. |
| Milk (Dairy) | Whole milk (3.5% fat) is the professional standard. | The higher fat and protein content creates a creamy, stable microfoam. It’s ideal for texturing and pouring latte art. |
| Milk (Alternatives) | "Barista" versions of oat, almond, or soya milk. | These are specially formulated with stabilisers to prevent splitting and create a better foam, mimicking the performance of dairy milk. |
Choosing the right ingredients is half the battle won.
For dairy, whole milk is the go-to for most baristas because its higher fat and protein content creates a silky, stable microfoam that’s perfect for latte art.
But the world of plant-based milks offers some fantastic alternatives:
- Oat Milk: A crowd favourite for its creamy texture and neutral flavour that lets the coffee notes shine. It steams exceptionally well, often mimicking the consistency of dairy.
- Almond Milk: Lighter in body and can be trickier to steam, but it offers a pleasant nutty undertone. Always look for barista-specific blends, which are formulated for better performance.
- Soya Milk: A classic alternative that produces a thick, dense foam. Its distinct flavour can be a feature in itself, pairing especially well with darker roasts.
The secret to a café-quality latte isn't just about technique—it's about starting with ingredients that inspire you. Freshly roasted beans and the right milk are the foundation you build everything else on.
Selecting the Right Equipment
The tools you use will define your latte-making process. For those who enjoy the hands-on ritual, a traditional setup offers complete control over every single variable. This classic toolkit includes an espresso machine with a steam wand, a quality burr grinder for consistent grounds, a weighty tamper to compress the coffee puck, and a stainless steel milk pitcher.
On the other hand, in a busy office, consistency and convenience are everything. A premium bean-to-cup machine automates the entire process beautifully.
It grinds the beans, tamps the grounds, extracts the espresso, and steams the milk to perfection, all at the touch of a button. This guarantees everyone gets the same excellent latte every single time, with no specialised training needed. It’s the simplest way to deliver consistently high-quality coffee and enhance the daily experience for the entire team.
Pulling the Perfect Espresso Shot
The espresso shot is the very soul of your latte. It’s the deep, rich flavour base that harmonises with creamy milk to create that perfect coffee moment. Nailing this part of the process is non-negotiable; it’s what turns a daily routine into a moment of pure inspiration.
This isn’t just about pushing a button. It's about understanding the beautiful science happening in those few seconds, where you extract the perfect balance of sweetness, acidity, and bitterness from your coffee grounds.
The Golden Rules of Extraction
Every great barista follows a few key principles to pull a perfect shot. The first is the brew ratio—the relationship between the weight of your dry coffee grounds and the weight of your final liquid espresso.
For a classic double shot, a 1:2 ratio is an excellent place to start.
- Dose: Use 18 grams of finely ground coffee.
- Yield: Aim for 36 grams of liquid espresso in your cup.
This recipe gives you a balanced, full-bodied shot with enough intensity to cut through the milk in a latte without ever being overpowering.
Next up is your extraction time. Using that 1:2 ratio, a perfect shot should take between 25 to 30 seconds to pull, from the moment you hit the button to the moment you stop the flow. This timing is your most important cue for quality.
Think of extraction as a story unfolding in your cup. The first few seconds release bright acidity, the middle brings out that deep sweetness and body, and the final moments introduce bitterness. A 25-30 second extraction captures the complete, balanced narrative.
Mastering Your Grind and Tamp
Two actions make or break your shot before you even touch the machine: grinding and tamping. Your coffee needs to be ground finely—think powdered sugar, but with a slight grittiness. A consistent grind is absolutely crucial, as it allows water to flow through the coffee bed evenly.
If your grounds are uneven, you get channelling. This is where water finds the path of least resistance and blasts through certain spots, leaving the rest under-extracted. The result? A weak, disappointingly sour shot.
Once your 18 grams are in the portafilter, it's time to tamp. The goal is to create a perfectly level and uniformly compacted puck of coffee. Apply firm, even pressure—enough to seal the grounds together, but not so much that you’re straining yourself. A level tamp is your best defence against channelling.
Reading the Signs of a Perfect Shot
When the extraction begins, keep your eyes on the stream. The first dark drops should appear after about 5-8 seconds. The flow should then settle into a steady, thin stream that looks a bit like warm honey.
The colour should be a rich, reddish-brown, all topped with a stable, golden-brown layer of foam known as crema. This crema is the hallmark of a fresh, well-extracted shot.
If your shot gushes out in under 20 seconds, it will probably taste sour—a sure sign your grind is too coarse. If it trickles out slowly, taking over 35 seconds, it will taste bitter and burnt. That means your grind is too fine. Learning to spot these issues and tweak your grinder accordingly is the real secret to consistently delicious espresso.
Creating Silky Smooth Steamed Milk
You’ve pulled a perfect espresso shot. Now for the other half of the masterpiece: the milk. This is what elevates a simple coffee into a luxurious latte. The aim isn't that stiff, bubbly foam that sits on top like a cloud, but a velvety, glossy microfoam with the texture of wet paint and a subtle, natural sweetness.
Getting this right involves two distinct but connected phases. Master them both, and you'll unlock that signature silky mouthfeel that makes a great latte so comforting. It's all about adding air first, then refining the texture.
The Two Phases of Milk Steaming
Steaming milk is a delicate dance between aeration and texturing. Get the balance right, and you create the perfect canvas for your latte.
- Stretching (Aeration): This is where you introduce air into the milk. Start by keeping the steam wand tip just below the surface—you should hear a gentle, consistent hissing sound. This process creates tiny bubbles and starts to increase the milk's volume, building the foundation for your foam.
- Texturing (The Vortex): Once you've added enough air, it's time to plunge the steam wand a little deeper into the milk pitcher. By angling it slightly, you create a spinning vortex. This powerful whirlpool breaks down any larger bubbles from the stretching phase into a seamless microfoam while evenly heating the milk.
This simple infographic shows the core steps for creating the espresso base your steamed milk will eventually be poured into.
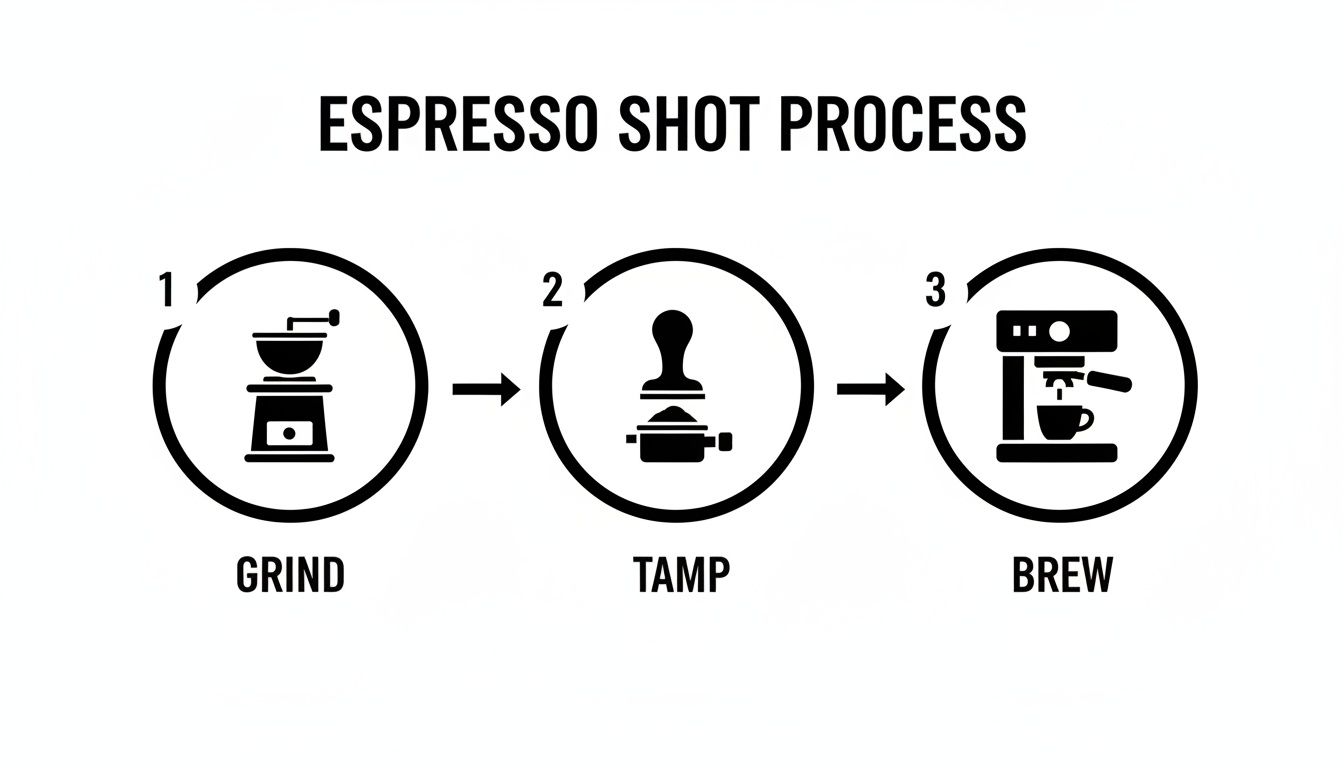
It really highlights how a consistent routine, from grinding right through to brewing, lays the foundation for a brilliant coffee.
Finding the Sweet Spot
Temperature is everything. You're aiming for a final temperature of around 60-65°C. In this range, the lactose (the natural sugars in milk) is at its absolute sweetest. If you go much hotter, you risk scalding it, which breaks down the proteins and gives the milk a burnt, unpleasant flavour.
A good rule of thumb? Stop steaming when the outside of the pitcher becomes too hot to comfortably hold for more than a second or two.
This focus on quality is something we see reflected in modern coffee habits, especially in the office. In the UK, lattes are a true workplace staple, fuelling 81% of professionals who drink more than one coffee during their working day. The average UK worker enjoys 2-3 cups daily, with lattes leading as the top choice at 35% preference. Interestingly, one in three Brits now opts for non-dairy milk. You can dig into more data on UK coffee consumption trends.
The perfect steamed milk shouldn't have any visible bubbles. It should be glossy, smooth, and pourable, seamlessly integrating with the espresso to create a single, unified drink.
Tips for Non-Dairy Alternatives
Steaming plant-based milks can be a bit different, as their protein and fat structures aren't the same as dairy.
Oat milk is often the star performer here, creating a creamy texture that’s remarkably similar to full-fat milk. For almond or soya, keep an eye out for "barista" editions. These blends are specifically formulated with different stabilisers and proteins to create a more stable microfoam and resist splitting when they hit the acidic espresso.
They often need slightly less aeration, so listen carefully and be ready to create that vortex a little sooner than you would with dairy. With a bit of practice, you can get that luxurious mouthfeel with just about any milk you choose.
Bringing It All Together with Simple Latte Art

Alright, you've pulled a flawless espresso shot and steamed your milk into that silky, glossy microfoam. Now for the magic. This is where the two parts unite to create your finished masterpiece. The final pour is so much more than just combining two liquids; it’s an art form that turns a great-tasting coffee into something truly special.
The way you pour determines the whole structure of the drink. Your goal is to get the milk and espresso smoothly integrated before letting that rich, white foam float on top, creating a canvas for your design. It’s this final touch that transforms a simple coffee break into an inspiring ritual.
The Perfect Pouring Technique
Confidence is everything here. Before you start, give your pitcher a firm tap on the counter to pop any big bubbles, then give the milk a gentle swirl to keep that smooth, wet-paint consistency.
Now, tilt your coffee cup at a 45-degree angle. This brings the espresso closer to the pitcher's spout, giving you more control.
Start pouring your steamed milk from a height of about two inches above the cup. This initial "high pour" is crucial—it lets the milk dive right under the espresso's crema, mixing everything perfectly without messing up that lovely top layer. Keep a steady, controlled stream aimed at the centre of the deepest part of the coffee.
Once the cup is about two-thirds full, it’s time to move in closer.
Think of your pour as a conversation between the pitcher and the cup. You start high to mix, then get low to draw. The height and speed of your pour directly control whether the milk integrates or sits beautifully on top.
Creating Your First Latte Art Heart
This is the really rewarding bit. As the cup fills, bring the tip of your milk pitcher as close as you can to the surface of the coffee. You should see a white dot of microfoam appear and start to expand into a circle. This is your canvas.
Keep pouring into the centre of this circle, letting it grow, all while slowly levelling the cup back to an upright position.
To finish your heart, it’s just one final motion:
- Once your circle of foam is the size you want, lift the pitcher just slightly. This slows the flow of foam.
- Pour a thin, final stream of milk straight through the centre of the circle, pulling from one edge to the other.
- As you "cut" through the circle, the drag of the pour will pull it into that classic heart shape.
Honestly, it might take a few tries to get the motion just right, but that first successful heart is a brilliant moment. It’s a simple design, but it’s the foundation for all latte art and a beautiful way to show real care in every cup you make. This small detail can delight colleagues, impress friends, and make every single latte feel special.
Delivering Quality Lattes in the Workplace
Making a single, handcrafted latte is one thing. Delivering dozens of consistently excellent ones in a busy office? That’s a whole different ball game. The challenge shifts from individual craft to efficient, repeatable quality control. It's about building a coffee culture that genuinely inspires people, day in and day out.
This is exactly where premium bean-to-cup machines come into their own. They take care of the entire process—grinding, tamping, extracting, and steaming milk—all at the touch of a button. This smart automation ensures every single person gets the same beautifully made latte, eliminating inconsistencies without needing a team of trained baristas.
A Boost for Morale and Productivity
The impact this has on a business is huge. Access to great coffee isn't just a simple perk; it's a powerful way to lift staff morale and productivity. It creates a natural hub for colleagues to connect, collaborate, or just recharge, turning the humble coffee break into a properly valuable part of the workday.
Lattes are particularly dominant in UK offices. A staggering 44% of out-of-home coffee is actually drunk at work, a market now valued at over £232 million. Bean-to-cup systems make it easy to meet this demand, especially when 46% of employees admit that free, quality drinks are a key reason they’re happy to return to the office.
Offering premium coffee is a clear signal that a company cares about its people's wellbeing. It shifts the office from being just a place to work to a destination where staff feel valued and looked after.
Enhancing the Professional Experience
That commitment also makes a great impression on visitors. Welcoming clients with a superb, barista-quality latte immediately sets a professional yet welcoming tone. To take it a step further, serving these drinks in elegant, custom coffee mugs can really elevate that polished, professional presentation.
At the end of the day, investing in a premium coffee solution makes the workplace a more attractive, inspiring, and enjoyable place to be. It's a simple change that pays real dividends in team happiness and a thriving company culture.
Your Common Latte Questions Answered
Even with the best technique, questions are bound to pop up on the journey to the perfect latte. That’s all part of the fun. Fine-tuning your craft is what it’s all about, and these common queries should help you troubleshoot and get one step closer to that perfect cup.
Why Is My Latte Milk So Bubbly?
This is a classic. Overly bubbly milk usually means you’ve introduced too much air at the start. When you're "stretching" the milk, you're aiming for a gentle, consistent hiss—not a loud, aggressive roar.
Try keeping the steam wand tip just below the surface for only a few seconds. Once you feel the milk jug start to warm up, dip the wand deeper to create that smooth, swirling vortex that textures the milk without adding more air.
The secret to silky microfoam is control. Always start with very cold milk straight from the fridge. This gives you a much longer window to create that perfect velvety texture before it gets too hot and the proteins start to break down.
Can I Make a Latte Without an Espresso Machine?
Absolutely. While a proper espresso machine gives you the ideal base, you can still craft a fantastic latte at home. The key is to brew a short, strong, concentrated coffee. An AeroPress, a Moka pot, or even a French press with a much higher coffee-to-water ratio will do the trick.
As for the milk, you’ve got a few options:
- Gently heat it in a pan on the stove or in the microwave.
- Use a simple handheld frother to whip it into shape and build some texture.
It won't be exactly the same as a café-style latte, but it will be delicious, satisfying, and a brilliant alternative.
What's the Difference Between a Latte and a Flat White?
It all comes down to the ratios and the texture of the milk. Think of a latte as a milk-forward drink. It’s served in a larger glass and has a distinct layer of foam on top, usually about 1cm thick, making it a softer, creamier experience.
A flat white, on the other hand, is a more intense coffee hit. It has a higher ratio of coffee to milk, is served in a smaller cup, and features just a very thin, velvety layer of microfoam that’s fully integrated into the drink. This lets the espresso flavour shine through for a much bolder taste.
Ready to bring consistent, barista-quality coffee into your workplace? Ue Coffee Roasters partners with premium bean-to-cup machine suppliers to deliver an exceptional coffee experience, effortlessly. Explore our office solutions.