
How to Make Espresso: Expert Tips for Perfect Shots
Making great espresso at home is a genuine craft, a delicate dance between art and science. It’s all about getting a feel for the key variables—grind size, coffee dose, and extraction time. Once you learn to balance these, you’ll be pulling shots that rival your favourite local café. The real joy comes from building that intuition, understanding how tiny tweaks can lead to that perfect, rich, syrupy shot of coffee.
Your Journey to Exceptional Home Espresso
Welcome to the world of home-brewed espresso. Think of this guide as your personal coach, here to cut through the jargon and demystify the process behind that incredible shot you get from your go-to UK coffee shop. We’ll focus on the practical skills that actually make a difference, from choosing amazing beans from local UK roasters to mastering that delicate balance of grind, dose, and time.
This isn't about just following a recipe; it’s about developing a sixth sense for it. You'll soon learn to see, smell, and taste the subtle shifts in every shot, which is what empowers you to create consistently brilliant espresso that’s dialled in perfectly for you.
The Growing Passion for Quality Coffee
The UK's love affair with brilliant coffee has never been stronger. That vibrant café scene has inspired millions of us to try and replicate that same quality at home. In fact, our collective coffee habit is only growing—out-of-home coffee consumption is on a steady rise, with weekly visits expected to hit 15.1% by 2025. That's over 7.9 million of us seeking out a great cup on a regular basis. This surge just goes to show how much we appreciate quality, and it's pushing home baristas everywhere to up their game.
As you dive deeper into your own home espresso journey, it's always worth exploring different perspectives. For some really focused insights, the Coffee Masters Series is a great place to broaden your understanding.
The real goal here is to build your own intuition. Start thinking of your espresso machine less like an appliance and more like an instrument. Learning to play it well is where the magic happens, turning a simple morning routine into a moment of pure satisfaction.
Before we get into the nitty-gritty of each step, let's get our essentials in order. This table gives you a quick-glance checklist of the gear and targets you’ll need to have in mind.
Espresso Essentials At a Glance
Here’s a quick summary of the core components and target parameters for a great espresso shot. Getting these right from the start will make your life a whole lot easier.
| Component | Recommended Specification (UK Focus) | Why It Matters |
|---|---|---|
| Coffee Beans | Freshly roasted (5–20 days post-roast) | Freshness is key for flavour and crema. Old beans produce flat, lifeless shots. |
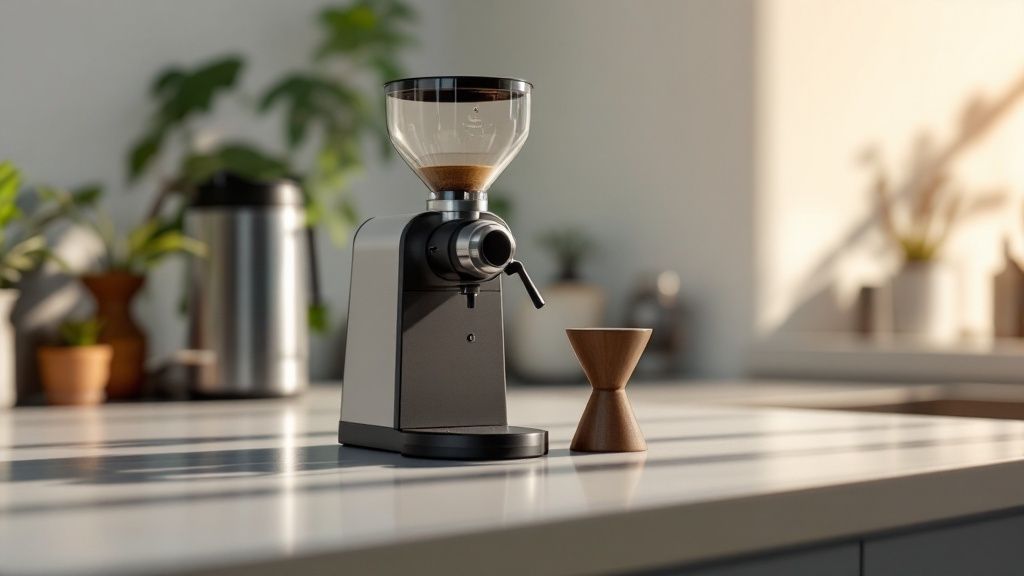
| Grinder | Burr grinder (stepless or micro-stepped) | Provides the consistent, fine grind needed for proper extraction. Blade grinders won't cut it. |
| Dose | 18–20 grams of ground coffee | This is the foundation of your shot's strength and body. Consistency here is crucial. |
| Yield | 36–40 grams of liquid espresso | The classic 1:2 brew ratio (dose in, liquid out) creates a balanced, full-bodied shot. |
| Extraction Time | 25–30 seconds (from first drip) | This timing ensures you extract the sweet spots of the coffee without bitterness or sourness. |
| Water Temperature | 90–94°C | The right temperature correctly dissolves the coffee solids, impacting the final flavour profile. |
Think of these numbers not as rigid rules, but as a solid starting point. They give you a reliable baseline from which you can start experimenting and tailoring each shot to the specific beans you're using and your own personal taste. Now, let's dive into the process.
Selecting Your Beans and Prepping Your Machine
The journey to a truly remarkable espresso begins long before you even touch your machine; it starts with the beans. Here in the UK, we're spoiled for choice with a thriving speciality coffee scene, where local roasters pour their passion into sourcing and perfecting their craft. Learning to decipher the story a bag of coffee tells is your first real step towards brewing with intention.
Forget about those generic "espresso blend" labels. The most important thing to look for is the roast date. Coffee is a fresh product, and its vibrant flavours are at their absolute peak between 5 and 20 days after roasting. This window is where the magic happens. It gives the beans enough time to de-gas properly while holding onto the volatile compounds that create that rich, stable crema and a truly complex flavour profile.
Reading the Bag Like a Barista
When you pick up a bag from a UK roaster, pay attention to the details they provide. These clues will tell you everything you need to know about what's waiting for you inside.
- Tasting Notes: Don't dismiss words like "chocolate," "stone fruit," or "caramel" as just marketing fluff. They're a genuine guide to the inherent flavours of the bean, shaped by its origin and processing. A natural-processed Ethiopian coffee, for instance, might promise notes of blueberry, while a washed Colombian could offer a much cleaner, citrus-like acidity.
- Roast Profile: For espresso, you’ll typically want a medium to medium-dark roast. Lighter roasts can be incredibly bright and delicious, but they are often far more challenging to extract correctly, sometimes resulting in sharp, sour shots. A slightly more developed roast is a much more forgiving starting point, delivering those classic rich and syrupy flavours we all love.
- Processing Method: How the coffee cherry was processed at the farm has a massive impact on flavour. "Washed" coffees tend to be cleaner and brighter. In contrast, "natural" or "honey-processed" beans often have a much fruitier, fuller-bodied character.
The Critical Warm-Up Routine
Once you've chosen your beans, it’s time to prep your workspace. A common mistake that leads to instant disappointment is brewing with a cold machine. Espresso extraction is a delicate thermal dance, and a cold portafilter or group head will suck the heat right out of your brew water.
This sudden temperature drop is a primary cause of sour, underdeveloped shots. It stops the water from properly dissolving all the coffee's desirable compounds, leaving you with a thin, unpleasant drink.
Think of it like cooking on a cold pan—you simply won't get the desired result. Preheating your machine is completely non-negotiable for flavourful, balanced espresso. It ensures thermal stability from the moment you start the shot.
Before pulling your first shot of the day, lock your empty portafilter into the group head and let the machine warm up for at least 15-20 minutes. Then, just before you grind your beans, run a "blank shot" of hot water through the portafilter and into your cup. This simple ritual does two crucial things: it purges any old grounds and ensures both your portafilter and cup are piping hot, ready to preserve the delicate flavours of your perfectly pulled espresso.
Mastering the Grind and Perfecting Your Tamp
This is where the magic really happens. Getting the grind and tamp right is the creative heart of making espresso, the stage where you get to sculpt the final flavour in your cup. It’s a rewarding skill to master and the key to unlocking your coffee's true potential.
Similarly, a good tamp is less about brute force and more about consistent, gentle finesse. It’s a quiet, focused ritual that makes sure water flows evenly through the coffee, preventing weak spots that lead to a disappointing, unbalanced shot. Get these two steps right, and you've built the foundation for amazing espresso.
This image breaks down the journey from a whole bean to a perfectly prepared puck of coffee, ready to go.
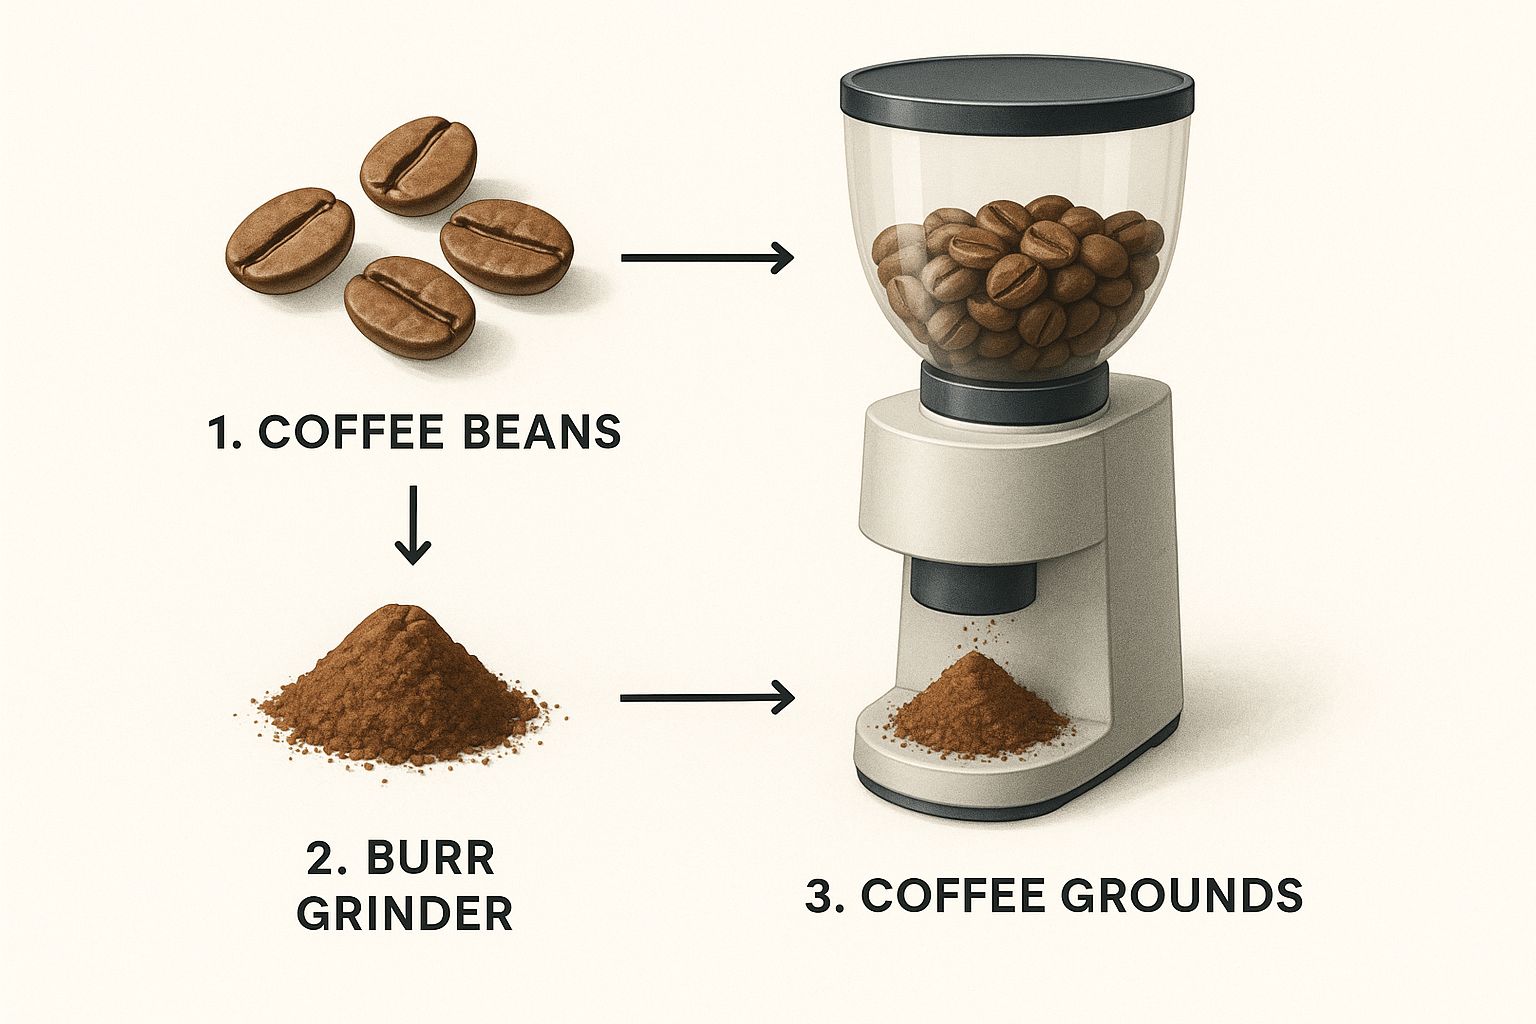
As you can see, a precise, uniform grind is the critical starting point for getting that even, flavourful extraction we're all chasing.
Dialling In Your Grind
Think of your grinder's adjustment collar like the focus ring on a camera lens. Tiny movements can bring the entire picture into sharp, clear view. Your goal is to find that perfect grind size that lets your shot extract in the ideal 25-30 second window.
Let's imagine you've just brought home a new bag of medium-roast beans. You pull your first shot, and it gushes out in just 15 seconds, looking pale and watery. The taste confirms it: sour, acidic, and thin. This is a classic sign of an under-extracted shot. Your grind is far too coarse, and the water has blasted through the coffee without enough time to pull out any of the good stuff.
Okay, so you adjust your grinder to a much finer setting. You pull another shot. This time, it takes 40 seconds, and the espresso just drips slowly and reluctantly from the portafilter. It looks almost black. The taste? Bitter, harsh, and burnt. You've gone too far the other way and over-extracted it. The grind was so fine that the water struggled to get through, dragging out all those unpleasant, bitter compounds.
The sweet spot is always in the middle. Your mission is to find the grind setting that produces a balanced shot—rich with sweetness and body—that flows like warm honey in that magical 25-30 second timeframe.
Achieving the Perfect Tamp
Once your grind is dialled in, it’s time to tamp. The goal here isn't to press down as hard as you can. It's all about consistent, level pressure that compacts the grounds into a flat, even puck. An uneven tamp is one of the main reasons for channelling, where water finds the easiest path through and bypasses most of the coffee.
Here’s how to build a solid technique:
- Level the Grounds: After grinding into your portafilter, use a distribution tool or even just your finger to create a flat, even surface. Fill in any gaps.
- Get Your Position Right: Stand comfortably and place your portafilter on a flat surface. Hold the tamper like a doorknob, keeping your elbow bent at a 90-degree angle directly above it.
- Apply Gentle, Level Pressure: Press straight down until you feel the coffee bed push back. You don’t need a huge amount of force; you’re just compacting the grounds to get rid of any air pockets. A consistent 15kg of pressure is a great target, but consistency matters more than the exact weight.
- Finish with a Polish: Without adding any more pressure, give the tamper a gentle twist as you lift it. This "polishes" the surface of the puck, helping to promote an even extraction.
By focusing on these little details, you’ll develop the muscle memory to create a perfect puck every single time. This consistency in your grind and tamp is what turns making espresso from a game of chance into a reliable and deeply satisfying craft.
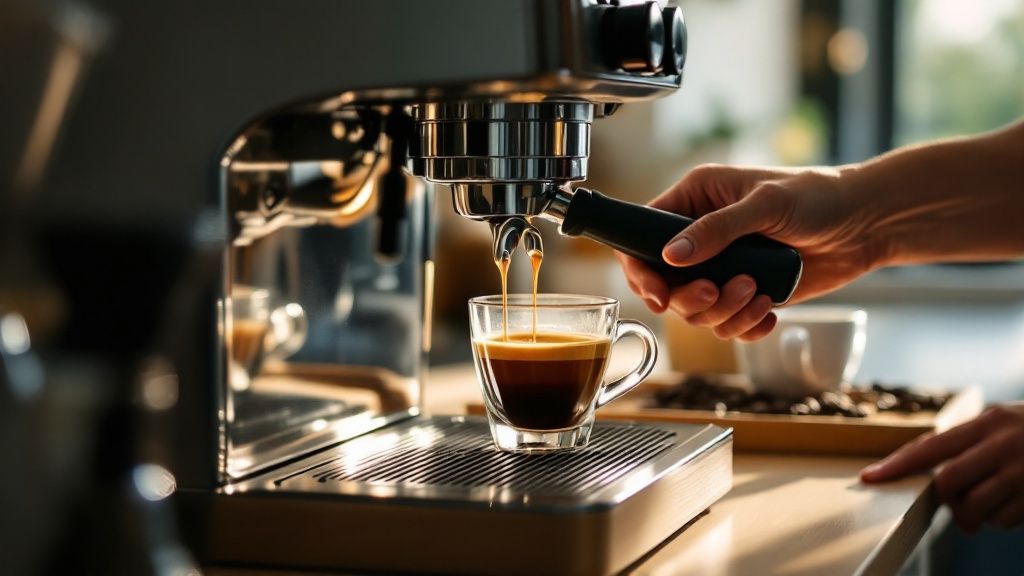
Pulling the Perfect Shot
You’ve meticulously ground your beans and the machine is humming, ready to go. This is the moment of truth. Brewing espresso is a beautiful, fleeting performance—it’s all about translating your careful preparation into a few seconds of pure extraction to create a shot that’s balanced, rich, and deeply satisfying.
This is where you become both an artist and a scientist. You’ll learn to read the visual cues of the brew, which is what separates someone who just follows steps from a truly intuitive home barista. Honestly, that skill is what makes the difference between a good shot and an unforgettable one.
The Golden Rules of Extraction
To get that intuition dialled in, let’s start with a couple of core principles. Think of these not as rigid laws, but as your trusted starting coordinates on the map to delicious espresso. Nailing how to make espresso consistently really hinges on understanding this balance.
First up is your brew ratio. In the UK speciality coffee scene, a 1:2 ratio is the gold standard. It’s simple: for every gram of dry coffee you put in your portafilter, you want double that weight in liquid espresso coming out.
- For example: If you dose 18 grams of ground coffee, you're aiming for a 36-gram liquid espresso yield in your cup.
The second principle is extraction time. Your target is a total brew time of 25 to 30 seconds, starting the moment you hit that button. This window is widely seen as the sweet spot for pulling out all the good stuff—the sugars, oils, and acids—while leaving the harsh, bitter compounds behind.
These two things, ratio and time, are completely interconnected. Hitting your target yield within your target time is the clearest sign that your grind size is bang on, laying the foundation for a well-balanced taste.
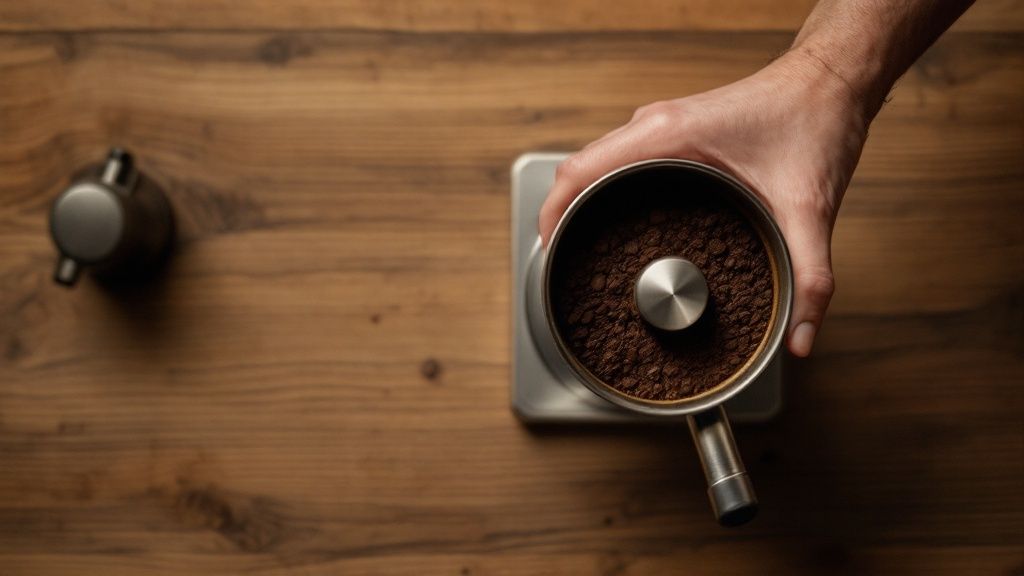
Reading the Flow
Grab your preheated cup, pop it on a digital scale, and zero it out. Now, start your shot and watch closely. A perfect extraction should begin with dark, viscous, almost treacle-like drips. These will then come together into a steady, consistent stream that looks a bit like warm honey.
The colour of the stream should be a rich, reddish-brown. Pay attention as it brews—towards the end of the extraction, you'll see the stream get lighter and more watery. This is known as ‘blonding’, and it’s your cue that all the best flavours have been extracted. It's time to stop the shot. Pushing it any further will only add bitterness.
The final visual reward? The crema. A well-pulled shot will be topped with a thick, stable layer of reddish-brown crema, often with beautiful mottled patterns people call 'tiger striping'. This isn't just for show; this layer of emulsified oils and CO₂ gas is a hallmark of freshness and a successful extraction. Using scales to precisely measure your yield takes the guesswork out of it, giving you the data needed to make your results repeatable, morning after morning.
Troubleshooting Your Espresso Shot
Even the most experienced baristas pull a bad shot now and then. Don't sweat it. The key is to understand why it went wrong so you can adjust. Think of your taste buds and eyes as your best diagnostic tools.
This quick table should help you pinpoint the issue and get back on track.
| Problem (Taste/Look) | Likely Cause | How to Adjust Your Technique |
|---|---|---|
|
Sour or acidic taste Shot runs too fast (<20 secs) |
Under-extraction. The water passed through the coffee too quickly to pull out the sweet flavours. | Your grind is too coarse. Adjust your grinder to a finer setting. This will create more resistance for the water. |
|
Bitter or burnt taste Shot runs too slow (>35 secs) |
Over-extraction. The water was in contact with the coffee for too long, extracting bitter compounds. | Your grind is too fine. Adjust your grinder to a coarser setting to allow the water to flow through more easily. |
|
Watery body, pale crema Shot might be fast or slow |
Channeling. Water found a path of least resistance through the puck, leading to uneven extraction. | Improve your puck prep. Focus on distributing the grounds evenly before tamping and ensure a level, consistent tamp. |
|
No crema, tastes weak Shot might run very quickly |
Stale coffee beans. The CO₂ gas that creates crema has dissipated over time. | Always use freshly roasted beans. Buy beans with a "roasted on" date and use them within a few weeks for the best results. |
Think of every shot as a piece of feedback. A little tweak to your grind size or a bit more care with your tamping can make all the difference. Keep practising, and you'll be pulling incredible espresso in no time.
Finishing Touches and Essential Maintenance
You’ve pulled a beautiful shot of espresso. The hard part is over, right? Well, almost.
That perfect little coffee is a canvas, ready to be sipped as is or turned into your favourite flat white. But before you reach for the milk jug, take a moment. Swirl the espresso gently and have a taste. Can you pick out any of the roaster's tasting notes? Are you getting that rich chocolate you were hoping for, or maybe a brighter, fruity acidity? Learning to taste your own shots is a huge part of figuring out how to make espresso that you genuinely love.
For those who fancy a latte or cappuccino, it’s time to steam some milk. The aim here is silky microfoam—that glossy, wet-paint texture, not a stiff, bubbly foam bath. You get this by introducing air for just the first few seconds of steaming, then sinking the wand to create a swirling vortex that mixes it all together.
Protecting Your Investment
Your relationship with your machine doesn't stop when you’ve made your coffee; it’s a partnership that needs a bit of care. A clean machine isn't just about being tidy—it's absolutely critical to the flavour of your coffee.
Old coffee oils build up fast, turning rancid and adding a bitter, unpleasant taste to every single shot you pull. Consistent maintenance is probably the most important—and most overlooked—part of the whole process.
Making great coffee at home is becoming a serious hobby for many. The UK's home coffee machine market is growing as more of us chase that premium café experience without the price tag. This just goes to show how much value people place on quality gear, and looking after that investment is key. You can explore more data on the UK's coffee at home habits to see just how big this movement has become.
A Simple Maintenance Checklist
Don't let the thought of cleaning put you off. A few simple habits will keep your equipment in top shape and make sure every espresso tastes as fresh and clean as it should.
- After Every Session: Purge the group head with a blast of hot water, give the steam wand a wipe immediately after you use it, and clean out your portafilter and basket. This takes less than a minute but saves you a world of pain later.
- Once a Week: If your machine supports it, do a backflush using a proper cleaning powder. This clever process forces water and cleaner back through the group head and its inner workings, dissolving stubborn coffee oils that a simple water flush won't touch.
- Every Few Months: Depending on how hard your water is, you’ll need to descale your machine to get rid of mineral build-up. It’s also a good idea to clean your grinder's burrs to remove any old grounds and oils.
Think of machine maintenance as part of the recipe for great espresso. It’s a non-negotiable ingredient that ensures the clean, vibrant flavours of your carefully selected beans are what you taste in the cup, not the ghost of last week's coffee.
Frequently Asked Questions About Home Espresso
Diving into the world of home espresso is a fantastic journey, but it's completely normal for questions to pop up. Think of them less as problems and more as a chance to get to know your coffee and your machine a little better. Here are some of the most common queries we hear from aspiring baristas across the UK.
Why Is My Espresso Always Sour?
A sour, overly acidic shot is probably the most common hurdle when you're starting out. In 9 out of 10 cases, this is a classic sign of under-extraction. All that means is the water is rushing through the coffee grounds too fast, so it doesn't have time to pick up all the sweet, delicious compounds we're after.
The first port of call is always your grind size. Try adjusting your grinder to a slightly finer setting. This creates more resistance, slowing the water down and giving it a chance to extract properly. If you’re confident your grind is fine enough, double-check your dose—using too little coffee for your basket size can also cause a fast, sour shot.
Do I Really Need a Digital Scale?
Honestly? Yes. While you can pull a shot without one, a good digital scale is the single biggest upgrade you can make for shot-to-shot consistency. It takes all the guesswork out of the two most critical variables: your dose (the grams of coffee you put in) and your yield (the grams of espresso that end up in the cup).
For instance, if you're aiming for an 18g dose and a 36g yield, you’ve got a precise 1:2 brew ratio. Without a scale, you're just eyeballing it, and that can lead to wildly different results every time. A scale turns a hopeful guess into a repeatable method, and that’s the foundation of learning to make great espresso.
What's the Difference Between a 'Split Shot' and a 'Bottomless' Portafilter?
You'll see both of these used in cafés and by home enthusiasts all over the UK. They both do the same basic job of holding the filter basket, but they deliver the espresso in a very different way.
- Split Shot (or Spouted) Portafilter: This is the traditional style with two spouts at the bottom. It lets you split a double shot into two cups at once and is generally a bit more forgiving and less messy.
- Bottomless (or Naked) Portafilter: This one has the bottom completely removed, so you can see the entire filter basket as the espresso extracts. It's an amazing diagnostic tool because it instantly shows you how evenly the water is flowing through your puck. Any flaws in your prep will show up as "channelling" – little jets of water squirting out unevenly.
Using a bottomless portafilter can feel a bit daunting at first, but the instant visual feedback it gives you is priceless. It forces you to perfect your puck prep, which is the fast track to pulling more balanced, delicious extractions every single time.
Ready to put all this into practice? A truly great shot starts with phenomenal beans. At Ue Coffee Roasters, we source and roast exceptional coffees that are perfect for any brewing method. Explore our range of single origins and signature blends to take your home espresso to the next level. Find your next favourite coffee at https://www.uecoffeeroasters.com.