

How to Steam Milk for Café-Quality Foam at Home
Steaming milk is one of those skills that looks simple but completely transforms your coffee game once you nail it. It’s about taking a basic ingredient and turning it into the velvety, glossy heart of your drink. This process, which creates what we call microfoam, doesn't just add texture—it actually unlocks the milk's natural sweetness, giving you that authentic café taste at home.
The Art and Science of Perfectly Steamed Milk
Welcome to the craft of perfectly steamed milk—the soul of any great latte, cappuccino, or flat white. This isn't just about blasting milk with hot air until it’s bubbly. It’s about creating an incredible, paint-like texture that blends seamlessly with your espresso.
First things first: always start with cold, fresh milk. This is non-negotiable. The proteins and fats in the milk are your best friends here, and they need that cold start to work their magic, creating and holding onto that beautiful, silky foam. Mastering this often comes down to getting your quantities and temperatures right, and knowing how to convert recipe measurements like a pro is a surprisingly handy skill for getting consistent results.
The Foundation of Flavour and Texture
This is where we move beyond guesswork and start tuning into the little sensory cues that guide professional baristas to perfection every single time. It’s a bit of an art, but it’s one you can learn by paying attention to the details.
- The Sound: You’re listening for a gentle, consistent hiss as you introduce air. A loud, violent screech means you’re doing it wrong.
- The Sight: Look for a smooth, swirling vortex in the milk jug. This whirlpool effect is what’s texturing the milk into that glossy finish.
- The Feel: Use your free hand on the side of the jug to gauge the temperature. It’s your built-in thermometer.
Getting this right means your milk won't just look amazing—it will taste noticeably sweeter. When you heat milk to the sweet spot of 60-65°C, the lactose breaks down into simpler sugars, giving it a rich flavour you just can't get otherwise.
It’s time to stop settling for average and turn your daily coffee into a ritual you genuinely look forward to. Let's get you pouring with confidence so you can enjoy a truly exceptional cup, every single time.
Your Essential Toolkit for Steaming Success
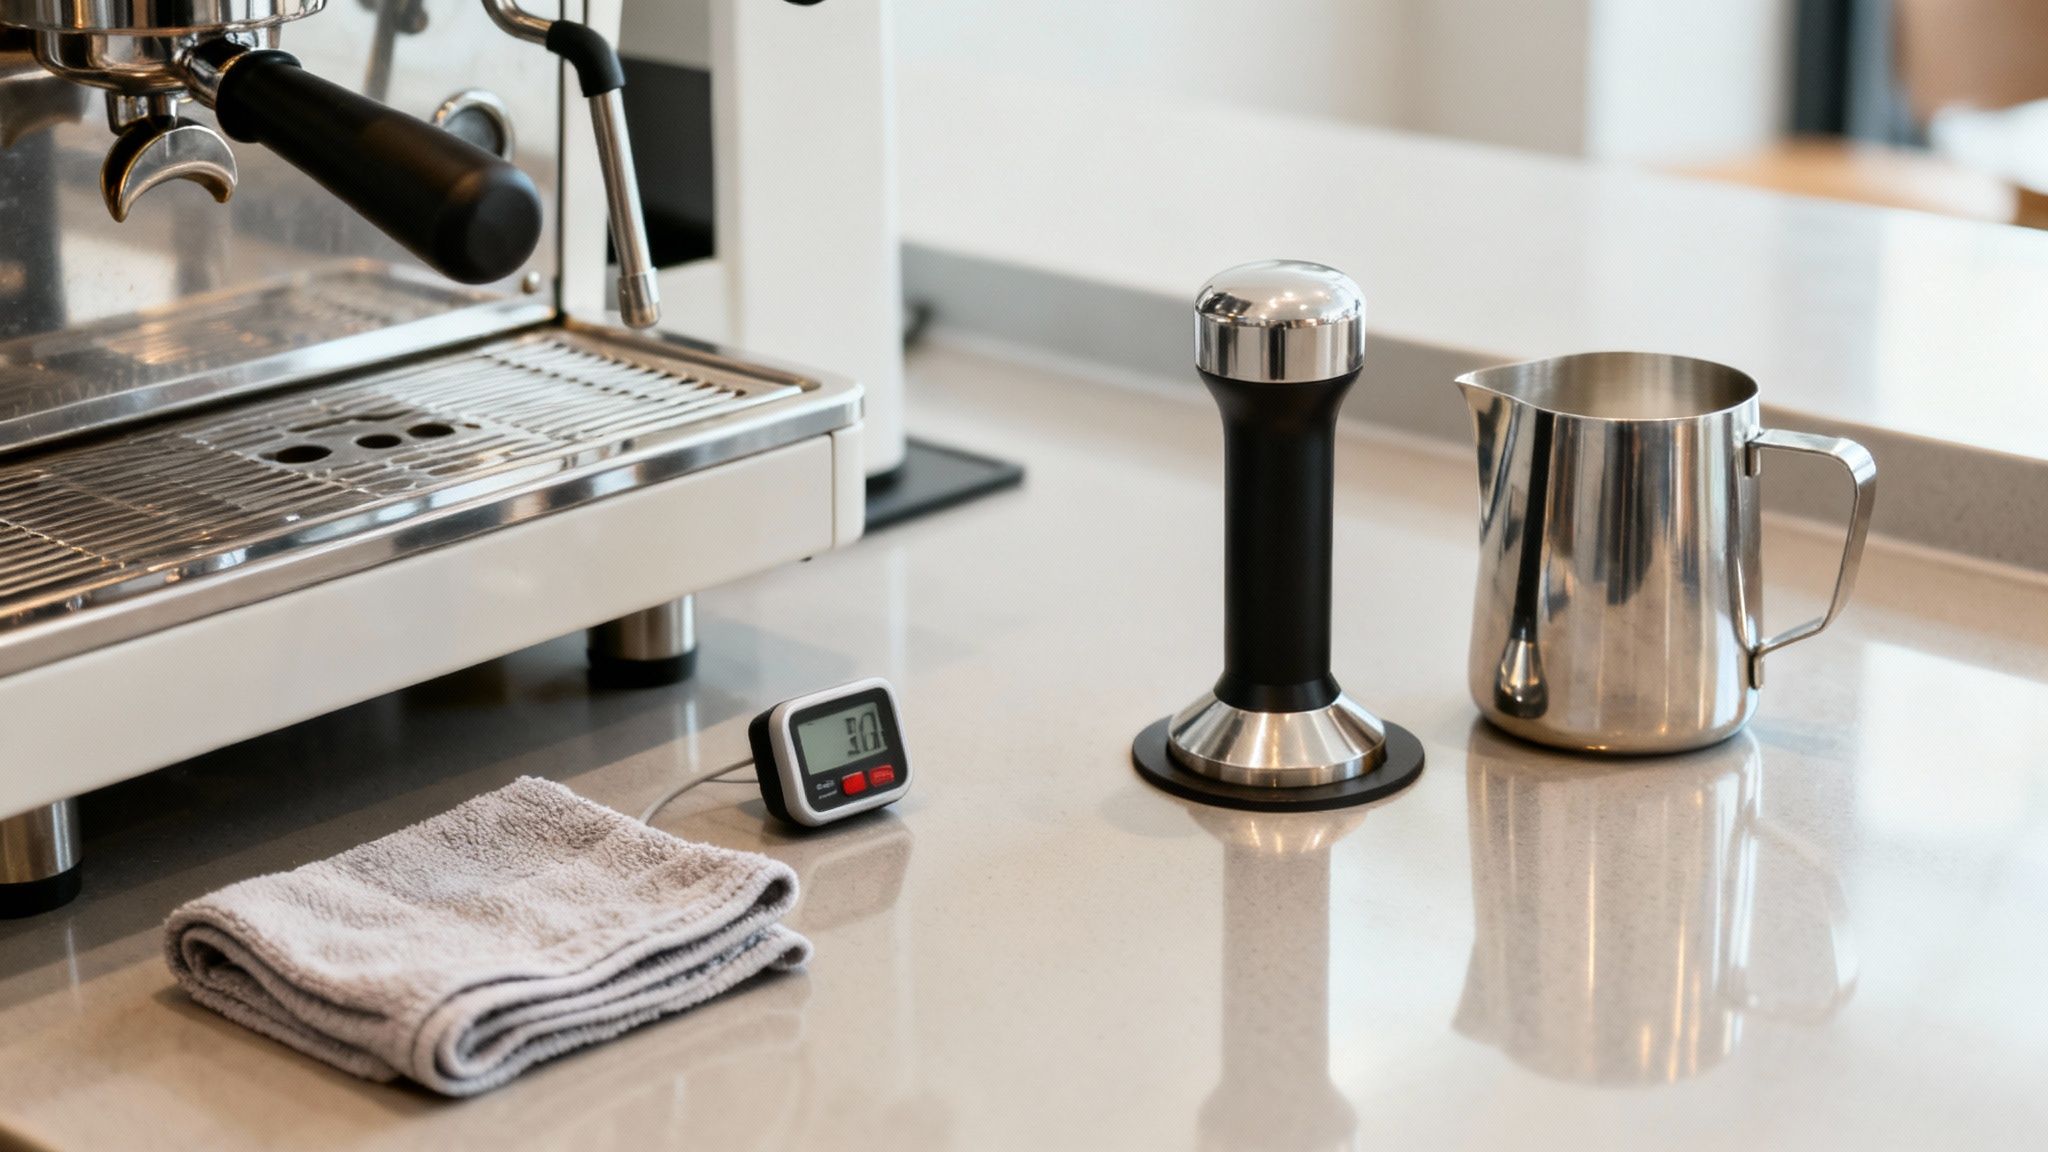
Before you can even think about creating that liquid silk we call microfoam, you’ve got to get your gear sorted. The journey to perfectly steamed milk doesn’t start with technique—it begins with assembling a simple, reliable toolkit. This isn't about splashing out on fancy gadgets; it's about choosing quality tools that give you consistent control.
At the heart of it all is your steam source. While the automated systems you find on bean-to-cup machines are brilliantly convenient, nothing beats the hands-on control of a manual steam wand on a proper espresso machine. This direct connection lets you feel the milk texturing in real-time, turning what could be a mechanical process into a genuine craft.
The Unsung Heroes of Your Setup
Beyond the machine itself, a few other bits of kit will make all the difference. Think of them as your trusted sidekicks, each playing a critical role in getting that perfect pour.
First up is a good stainless steel milk pitcher. It’s so much more than a simple jug. Its conductive material is your first guide to temperature, letting you gauge the heat by touch. More importantly, its shape is engineered to create a swirling vortex as you steam. This whirlpool effect is the secret to breaking down big, soapy bubbles into velvety microfoam.
Next, a reliable milk thermometer is an absolute must, especially when you’re just starting out. It takes the guesswork out of the equation, helping you consistently hit that 60-65°C sweet spot where milk’s natural sweetness shines. Go even slightly over, and you’ll scorch the proteins and sugars, leaving you with a burnt taste that no amount of latte art can save.
Your goal is to build a toolkit that feels like an extension of your own hands. The right pitcher, a dependable thermometer, and a powerful steam source work together to give you the confidence to experiment and perfect your craft.
Finally, don't underestimate the humble cleaning cloth. In fact, you need two. Keep one damp cloth exclusively for wiping the steam wand the second you’re done, and another for any spills. This isn’t just about being tidy; it's basic, non-negotiable hygiene.
Milk Steaming Equipment at a Glance
To make it even clearer, here’s a quick rundown of the essential tools you’ll need, whether you're working with a manual espresso machine or a fully automated setup.
| Equipment | Function | Key Consideration |
|---|---|---|
| Steam Source | Heats and aerates the milk | Manual wands offer control; automated systems offer convenience. |
| Milk Pitcher | Holds milk and creates a vortex | Stainless steel is best for temperature control and durability. |
| Milk Thermometer | Measures temperature accurately | A clip-on digital or analogue thermometer prevents scorching. |
| Dedicated Cloths | Clean the steam wand and spills | Use separate cloths for the wand and countertops to maintain hygiene. |
Having these items ready will set you up for success and make the whole process smoother and more enjoyable.
Keeping Your Gear in Top Condition
Pristine equipment is non-negotiable for both flavour and safety. A steam wand caked with old milk is a breeding ground for bacteria and will perform poorly, blocking steam jets and messing with your pressure.
Make these two steps a reflex after every single use:
- Wipe: Instantly wipe the wand clean with your dedicated cloth.
- Purge: Blast steam for a couple of seconds to clear any milk from inside the tip.
This simple routine stops residue from building up and keeps every coffee tasting clean and fresh. Remember, rinsing isn't enough—for a deeper dive, it’s worth understanding the difference between cleaning and sanitizing. With these tools assembled and a solid cleaning habit, you're perfectly equipped to start creating beautiful, café-quality drinks.
Choosing the Right Milk for a Velvety Texture
The single most important decision you'll make when learning to steam milk isn’t about your technique or your shiny new machine—it’s about the carton you pull from the fridge. Your choice of milk dictates the final texture, flavour, and just how forgiving the whole process will be. Think of it as choosing your canvas; the right one makes creating a masterpiece infinitely easier.
For aspiring home baristas and seasoned pros alike, whole cow's milk is the undisputed champion. Its magic lies in its perfect balance of fats, proteins, and sugars, a combination that is incredibly forgiving and makes it the ideal training partner while you get the hang of things.
That higher fat content, typically around 3.5%, is what creates the luxurious, velvety mouthfeel and stable, glossy microfoam we’re all chasing. The fat acts as a support system for the tiny air bubbles you're introducing, holding them together in a tight, uniform texture.
The Science Behind the Silkiness
When you introduce steam, you’re doing two things at once: heating the milk and forcing air into it. It’s the proteins in the milk—whey and casein—that actually create the foam. As they heat up, these proteins unravel and wrap themselves around the air bubbles, trapping them.
This is where the fat globules step in to stabilise the whole structure, giving your foam that rich, lasting quality. It's why whole milk is so reliable; it has enough fat to create a strong, stable foam that doesn't just collapse the moment you turn off the steam wand. It's a key reason the UK's coffee culture relies so heavily on it. As the demand for great coffee grows, GB milk deliveries recently hit a staggering 1,069 million litres in a single month, with whole milk volumes seeing a significant 2.4% jump. You can find more insights on UK dairy trends over at ahdb.org.uk.
Working with Lower-Fat Dairy Options
So, what if you prefer semi-skimmed or skimmed milk? You can absolutely still get a decent foam, but the experience—and the end result—will be quite different. With less fat to stabilise the protein structure, the foam you create will be much lighter, stiffer, and more airy. Think old-school cappuccino foam rather than the silky texture needed for a flat white.
Here’s a rough guide to what you can expect:
- Semi-Skimmed Milk: This is a middle ground. It produces a reasonable foam, but it’s less rich and can separate more quickly than its whole milk counterpart.
- Skimmed Milk: With virtually no fat, skimmed milk can create a huge volume of very stiff, dry foam. The trade-off is that it lacks that creamy texture and has a much shorter lifespan before it all breaks down.
When you're working with lower-fat options, your technique has to be much more precise. You’ll probably find you need a shorter stretching phase to avoid creating a rigid, bubbly foam that just sits on top of your drink instead of mixing in.
Key Takeaway: The less fat in your milk, the less stable your microfoam will be. You'll get more volume, but you'll sacrifice that signature velvety texture and creamy flavour that makes steamed milk so special.
Freshness and Temperature Are Non-Negotiable
No matter which milk you choose, two rules are absolute: it must be fresh, and it must be cold.
Freshness is critical. As milk ages, its proteins begin to break down, and degraded proteins just can’t trap air effectively. That’s why the carton that’s been sitting at the back of your fridge for a week simply won't foam properly, no matter how perfect your technique is.
Starting with properly cold milk, straight from the fridge (around 4°C), is just as important. The cold gives you a much longer window to introduce air and texture the milk before it hits that ideal final temperature of 60-65°C. If you start with lukewarm milk, you’ll hit that temperature far too quickly, long before you’ve had time to create a silky microfoam. The result? A hot, flat, and deeply disappointing drink.
Nail these fundamentals, and you're setting the stage for a perfect cup, every single time.
The Two Phases of Creating Silky Microfoam
This is where you go from just heating up milk to crafting liquid silk. The secret to that incredible, velvety texture isn’t one complicated move, but a simple two-part process. Forget about long, confusing steps; we’re going to focus entirely on what you can see, hear, and feel.
Think of learning how to steam milk like learning a dance. First comes the energetic, expressive part, and then you have the smooth, graceful finish. We call these two phases stretching and texturing. Mastering the seamless transition between them is the key to creating café-quality microfoam, every single time.
The First Phase: Stretching and Adding Air
The first few seconds are the loudest and, honestly, the most important. This is the stretching phase, and its only job is to introduce air into your cold milk, building the volume that will eventually become your foam. It’s an active, intentional process that sets the foundation for everything that follows.
You’ll want to position the tip of your steam wand just beneath the surface of the milk, slightly off-centre. As you open the steam valve, listen for a very specific sound: a gentle, consistent 'hissing' or the sound of tearing paper. That’s the sound of success. It tells you you're adding air at the perfect rate.
If you hear a high-pitched, violent scream, your wand is too deep. If you see big, ugly bubbles erupting on the surface, your wand is too high. It's all about finding that delicate sweet spot where you're adding air without creating chaos.
This stretching phase is surprisingly short—often just 5-8 seconds. You’re aiming to expand the milk's volume by about 20-30%. Watch the milk level rise in the pitcher; as soon as you see that initial growth, it’s time to move on. Stick around too long here and you’ll end up with stiff, bubbly foam that separates from the liquid milk. Nobody wants that.
The Second Phase: Texturing the Perfect Vortex
With the air successfully introduced, we glide into the second phase: texturing. This is the quieter, more elegant part of the dance where the real magic happens. Your goal now is to stop adding air and start refining what you’ve got.
To do this, simply dip the steam wand a little deeper into the milk—about a centimetre or so should do it. This simple adjustment silences the hiss and creates a silent, swirling vortex. This whirlpool is essential. It powerfully folds those larger bubbles you created during stretching back into the liquid, smashing them into millions of microscopic bubbles. This is what microfoam is all about.
The pitcher should be angled slightly to encourage that powerful rolling motion. Keep one hand on the side of the pitcher; this is your built-in thermometer. As the milk swirls, you'll feel the pitcher warm up steadily. You're no longer watching for volume, but for temperature and texture.
For the best results, you need to start with the right amount of cold milk. For a standard 12oz pitcher, fill it to the base of the spout's "V" shape with about 150-250ml of milk, chilled to around 4°C. While overall cow's milk sales in retail have seen a slight dip, whole milk remains a firm favourite for coffee lovers, with volumes rising by 2.4%. Its higher protein and fat content are perfect for creating the stable, silky bubbles we’re aiming for. You can find out more about these UK milk trends and what they mean for the industry.
The infographic below shows how different milk choices stack up.
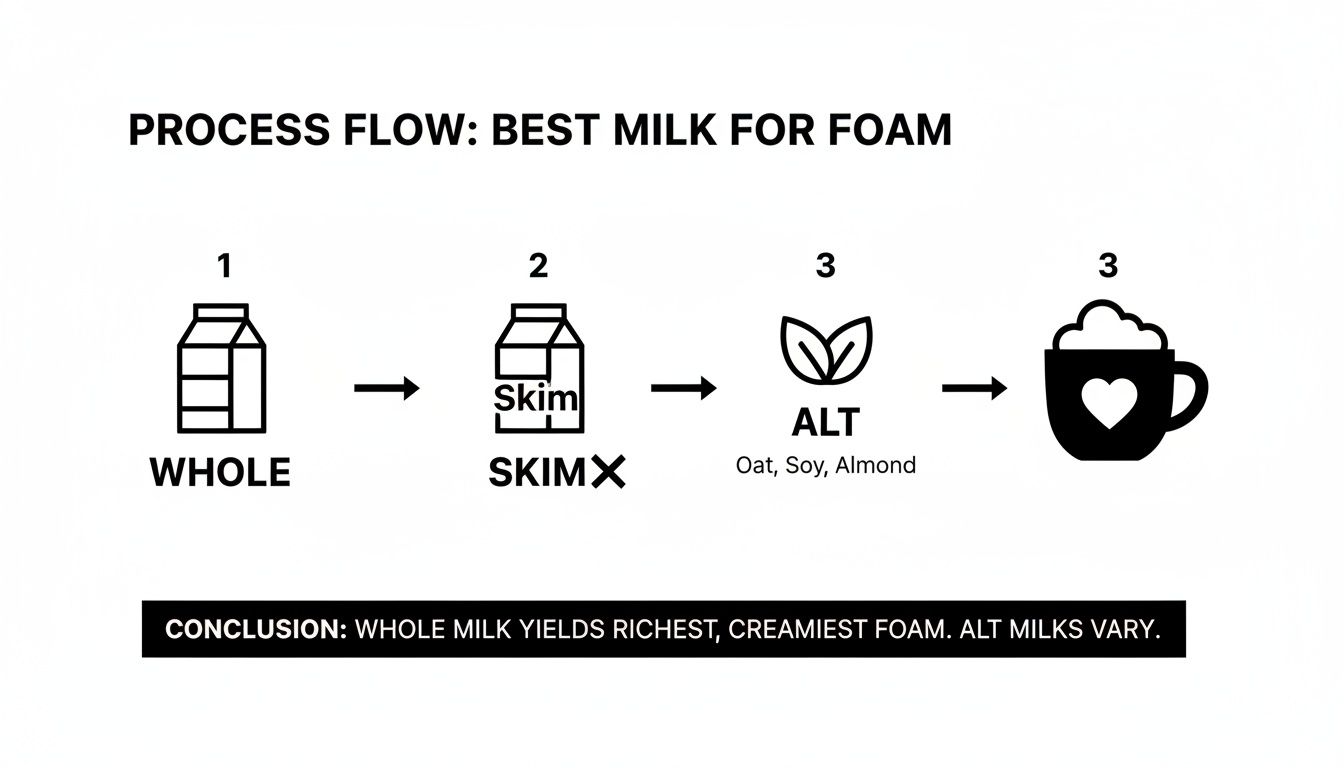
As you can see, whole milk consistently provides the richest and most stable foam, making it the best choice for learning and perfecting your technique.
Guiding Your Technique with Sensory Cues
Moving beyond guesswork and starting to rely on your senses is what separates good results from great ones. You don't need timers and complicated charts—you just need to listen, look, and feel.
Use your senses to guide your technique through the two key phases of milk steaming.
Milk Steaming Sensory Cues
| Phase | Sound Cue | Visual Cue | Target Outcome |
|---|---|---|---|
| Stretching | A gentle, consistent hiss like tearing paper. | The milk volume visibly increases by 20-30%. | Sufficient air is introduced to create foam. |
| Texturing | Complete silence. | A smooth, swirling vortex is visible in the pitcher. | Air is integrated, creating a glossy, uniform microfoam. |
Your hand on the pitcher is your final guide. As the texturing phase continues, the pitcher will go from cool, to warm, and then to hot. You’re aiming for a final temperature of around 55-62°C. At this point, the milk will have a beautiful sheen, and the pitcher will be almost too hot to hold comfortably for more than a second. This is your cue to shut off the steam immediately.
By understanding and practising these two distinct phases, you transform an intimidating task into an achievable, repeatable skill. It's about building confidence through sensory feedback, allowing you to create beautifully textured milk that will elevate every single coffee you make.
Mastering Temperature and Final Touches

You’ve navigated the hiss of stretching and the silent swirl of texturing. Now for the make-or-break moment. Getting the temperature right is what unlocks the milk's natural sweetness, creating that rich, satisfying flavour that separates a decent coffee from a truly great one. This is where your morning brew becomes a daily ritual you genuinely look forward to.
It’s not just about making the milk hot; it’s about precision. The magic window for perfectly steamed milk is between 60-65°C. This is the sweet spot where the lactose sugars are at their peak, perfectly complementing the espresso without any hint of bitterness. If you push much further, especially past 70°C, you’ll scorch the proteins and sugars, leaving you with a burnt, unpleasant taste.
Gauging the Perfect Temperature
So, how do you hit that narrow window every single time? There are a couple of reliable methods, and getting comfortable with both will give you unshakable confidence behind the machine.
Your first option, and the most accurate, is to use a dedicated milk thermometer. A simple clip-on thermometer gives you real-time feedback and removes all the guesswork. As you texture the milk, just watch the dial climb and shut off the steam with pinpoint accuracy as it enters that ideal 60-65°C zone. It’s an invaluable tool, especially when you’re still getting the hang of things.
The second method is the classic barista technique: the hand test. By keeping one hand on the side of your stainless steel jug, you can feel the temperature rise from cold, to lukewarm, to properly hot. The moment the jug becomes too hot to comfortably keep your hand on it for more than a second is your signal. With a bit of practice, you’ll find this tactile cue lines up perfectly with the target temperature range. It feels more like an art, but it quickly becomes a very reliable skill.
Polishing Your Milk for a Flawless Finish
Once the steam is off, you’re not quite done. The next few seconds are what separate good milk from great milk. This final prep is where you refine the texture into a glossy, uniform liquid ready for pouring.
First, give the bottom of the jug a firm tap on the counter. This isn’t just for show; it’s a deliberate move to pop any large, clumsy bubbles that might have formed on the surface. This simple action is key to achieving that silky, uniform texture.
Immediately after tapping, get that milk swirling. A gentle, consistent, circular motion is all you need. This "polishing" integrates the microfoam with the hot milk, breaking down any separation and creating a single, cohesive liquid with a wet-paint-like sheen. Don't skip this—it's non-negotiable for pouring beautiful latte art or just enjoying a perfectly textured drink.
The perfect pour starts long before the milk hits the cup. It begins with precise temperature control and ends with these deliberate finishing touches—tapping and swirling—that create a truly seamless and velvety final product.
Your First Step into Latte Art
With your perfectly polished milk in hand, you're ready to create something beautiful. Pouring latte art can seem daunting, but even the pros started with the basics. Your first challenge is a simple heart—the foundational shape that teaches you all the core principles.
Here’s a quick guide to pouring your first heart:
- Tilt the Cup: Hold your cup at an angle, bringing the espresso closer to the jug.
- Start the Pour: Begin pouring your steamed milk into the centre of the espresso with a steady, thin stream.
- Bring it Close: As the cup starts to fill, lower the jug so the spout is almost touching the surface of the coffee.
- Create the Shape: You'll see a white dot of foam appear. Keep pouring into that same spot to grow it into a large circle.
- The Final Stroke: When your circle is the right size, lift the jug slightly and pull the stream of milk right through the middle to create the heart's point.
Don't sweat it if your first few tries aren't perfect. Consistency is everything. Professional training benchmarks show that dedicated practice can lead to 90% success rates in foam quality, turning a routine pour into something special. For more on the market that drives these standards, you can explore dairy market insights on ahdb.org.uk. Welcome to a larger, more creative world.
Right, let's get that milk sorted. Even after years behind the machine, some days the milk just doesn't want to play ball. Don't sweat it. Every jug that doesn't quite work out is a lesson in disguise, teaching you to listen, feel, and see what's happening.
Think of it this way: your steam wand is giving you direct feedback. A weird sound, a strange texture—it’s all information. Once you learn to interpret those cues, you're well on your way to getting that silky, glossy microfoam every single time.
Overcoming Bubbly, Soapy Foam
Is your milk looking less like paint and more like something you'd find in a bubble bath? This is probably the most common frustration when you're starting out, but thankfully, it's an easy fix. It almost always means you've let too much air in at the start.
You've simply overdone the "stretching" phase. To fix it, just cut back on that initial hissing time. You're looking for a gentle tssssk for just a few seconds—long enough to see the volume swell just a little. Then, get that wand buried deeper, faster, to start the texturing phase. That's when you'll be spinning the air you've added into a beautiful, silky microfoam instead of creating more big bubbles.
Every challenge you face is an opportunity to refine your senses. The sound of the hiss, the feel of the pitcher's temperature, the sight of the vortex—these are your true guides on the path to perfect milk.
Solving Thin and Watery Milk
The opposite problem is just as common: you end up with hot, watery milk that has no body or foam to speak of. This happens when the steam wand is plunged too deep, right from the get-go. All you're doing is heating the milk, not texturing it.
The solution here is all about your starting position. The tip of the wand needs to sit just below the surface of the milk. You have to hear that gentle tearing sound for the first few seconds. That initial burst of air is what gives the milk its body and is totally non-negotiable if you want foam.
In a busy café, getting this wrong has a real cost. Steaming mistakes can lead to as many as 25% of drinks being sent back. The pros nail the technique every time: wand tip inserted just 1cm below the surface, aerating for 5-8 seconds, then plunging it deeper to texture. That's the secret to consistency. You can read more about what's happening in the world of dairy and non-dairy with these UK milk trends heading into 2026 on freshground.co.uk.
Quick Fixes for Common Issues
Here are a few other classic problems and the quick tweaks to get you back on track:
- Screaming Milk: If you hear a high-pitched shriek, your wand is buried too deep and is literally boiling the milk. Lift the wand's tip closer to the surface to introduce a bit of air—the screaming will stop immediately.
- Foam Separates Quickly: Does your foam split from the liquid milk almost instantly? This is a sign that the texturing phase was too short or not powerful enough. You need to create a strong vortex and hold it for longer to fully blend the milk and foam into one glossy, stable liquid.
- Missing the Temperature Mark: It's easy to go too hot or too cold when you're learning. Don't be afraid to use a thermometer until your hand is calibrated to the right temperature. Pro tip: always stop steaming a few degrees before your target, as the milk's temperature will continue to climb for a second or two after you turn the steam off.
Your Milk Steaming Questions Answered
As you get to grips with making coffee, it’s only natural to have a few questions. Nailing your milk steaming technique takes a bit of practice, so let's run through some of the most common queries that crop up.
Can I Re-Steam Milk?
It’s a tempting shortcut, especially when you've over-poured, but you really shouldn't resteam milk. Once those milk proteins have been heated and stretched, their structure is permanently changed. Trying to steam it a second time will just give you a flat, thin texture and a faintly cooked flavour. All the magic has already happened.
For the best possible taste and texture, always start with fresh, cold milk for every single drink you make. It's a non-negotiable rule for quality coffee.
What’s That Awful Screeching Sound?
We've all been there. That high-pitched shriek usually means your steam wand is buried too deep in the milk without introducing any air. Instead of creating a silky texture, the steam is just aggressively boiling the milk from the inside out.
To fix it, just lower your jug so the wand’s tip is right at the surface when you start. You're listening for a gentle, paper-tearing hiss. Once you've got that, you can submerge the tip just a little deeper to get that silent, swirling vortex going.
How Do I Clean the Steam Wand Properly?
This is absolutely critical, both for hygiene and for keeping your machine in good nick. As soon as you finish steaming, there are two steps you must take immediately:
- Wipe it: Grab a clean, damp cloth (one you only use for the steam wand) and give it a thorough wipe down.
- Purge it: Blast the steam for a second or two. This clears out any milk residue that might be hiding inside the holes at the tip.
Never, ever let milk dry and bake onto the wand. It’s a nightmare to get off and can easily clog the steam holes, which will ruin your next coffee and could even damage the machine over time. Just think of it as the final, non-negotiable step in your coffee-making routine.
At Ue Coffee Roasters, we know that great coffee in the workplace is built on quality, consistency, and the right equipment. Our partnership with Franke bean-to-cup machines brings café-level excellence directly to your office, ensuring every cup is perfect. Explore our premium office coffee and refreshment solutions to see how we can help.