

How to Use an Aeropress: Easy Guide to Perfect Coffee
Learning to use an AeroPress is beautifully simple. You just combine coffee and hot water, give it a stir, and then press the brew through a filter. What you get is a smooth, rich, and ridiculously fast cup of coffee, often ready in under two minutes. It's this killer combo of speed and quality that has made it such a favourite.
Your Guide to the Perfect AeroPress Brew
So, you’ve decided to dive into the world of AeroPress. Good choice. This simple bit of kit has taken the UK coffee scene by storm, and for good reason. Whether you’re brewing in a tiny city flat or out in the middle of nowhere, this guide is here to help you master it. Think of it as your first step from just drinking coffee to confidently making it, unlocking a world of flavour that’s both easy to get to and seriously rewarding.
Its popularity isn’t just hype. The AeroPress has carved out a real niche in the UK, mainly because it delivers a quality cup in just 1-2 minutes. For anyone juggling a busy modern lifestyle, that’s a game-changer. It’s a massive advantage over methods like the French press, which can easily take up to nine minutes. This unique blend of convenience, quality, and portability has earned it a fiercely dedicated following, a trend you can see reflected in recent retail insights.
Why the AeroPress is So Beloved
What is it about this little plastic brewer that gets people so excited? It all comes down to its clever design, which blends immersion (letting the coffee steep) with pressure (the plunge). The result is a wonderfully clean and full-bodied cup, free from the grit you sometimes get with other brewers.
Better yet, the whole process is incredibly forgiving. This makes it perfect for beginners, but it still offers enough room for seasoned pros to tweak and experiment.
Here’s exactly why it’s become a staple in so many UK kitchens:
- Incredible Speed: A delicious, nuanced cup of coffee in a fraction of the time it takes to use other manual brewers.
- Exceptional Flavour: It consistently produces a bright, clean brew with low acidity and very little bitterness, letting the subtle notes of your favourite speciality beans really come through.
- Travel-Friendly Design: Made from durable, lightweight plastic, it’s the perfect travel buddy for any adventure, from camping in the Peak District to a weekend city break.
- Unmatched Versatility: Fancy a quick Americano? Or maybe an espresso-style shot for a flat white? The AeroPress can handle it all.
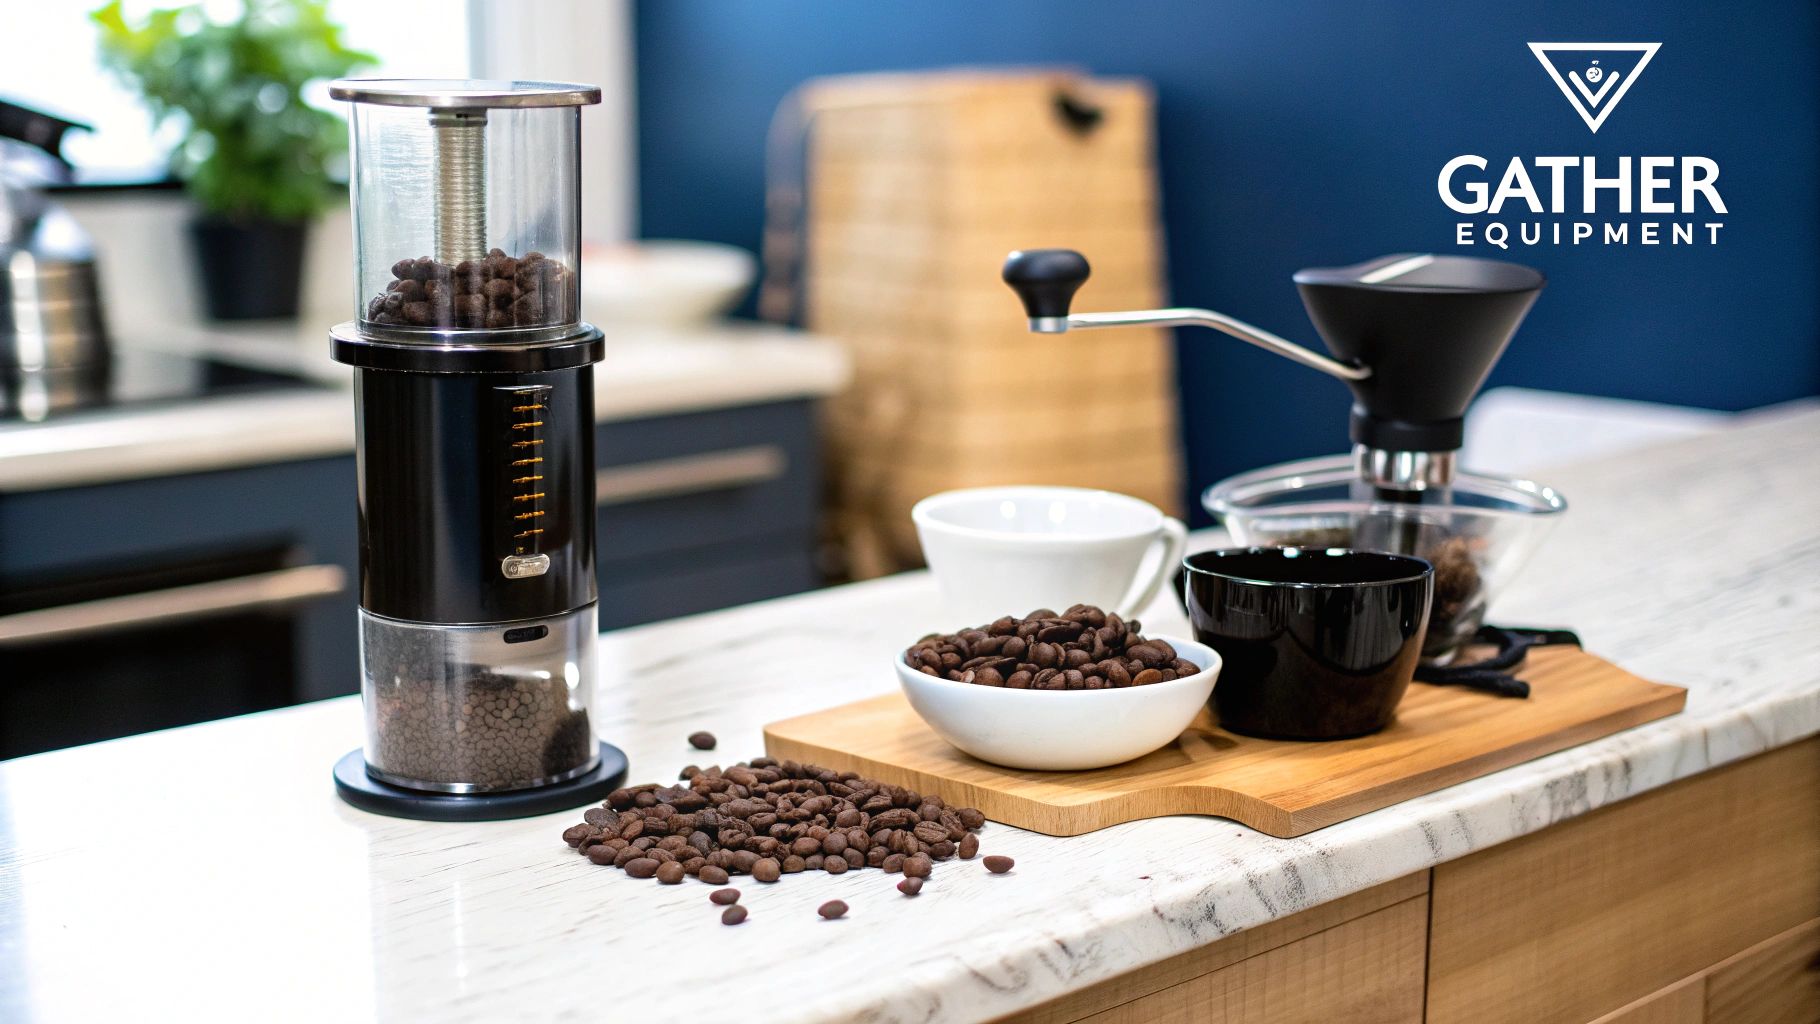
The Essential Kit to Get Started
The good news is you don’t need a mountain of complicated gear to get going. At its heart, brewing great coffee is all about good ingredients and a solid technique.
To start, you only really need four things: your AeroPress, a kettle, a reliable grinder, and some exceptional, freshly roasted coffee beans. Grabbing your beans from a UK-based roaster is always a good shout for guaranteeing freshness. This simple setup is all it takes to turn your daily coffee ritual into something truly special.
Choosing Your Coffee Grind and Water
Before you even touch the plunger, the real character of your brew is decided by two things: your coffee and your water. Getting these right isn't about following rigid rules. It’s about understanding how these two simple ingredients lay the foundation for a truly exceptional cup.
Let’s start with the soul of the brew—the coffee itself. To really see what the AeroPress can do, you need freshly roasted, single-origin beans. The UK has an incredible scene of independent roasters sourcing amazing coffees, and choosing beans roasted locally guarantees you’re brewing with coffee at its absolute peak of freshness and flavour.
Nailing the Perfect Grind Size
With great beans in hand, the next dial to turn is the grind. The size of your coffee grounds dictates how quickly water can pull out all that lovely flavour, and for the AeroPress, you’re aiming for a medium-fine consistency.
Picture the texture of table salt. It should be a little coarser than you’d use for espresso, but definitely finer than what you’d use for a drip filter.
That's your ideal starting point. If you have a decent burr grinder, this setting gives a fantastic balance of sweetness and clarity. If you're buying your coffee pre-ground, just ask your local roaster to grind it for an AeroPress—they’ll know exactly what you need. From here, you can start to play around.
Your own palate is the ultimate guide here. If your coffee tastes a bit sour or disappointingly thin, your grind is probably too coarse, leading to under-extraction. Just grind a notch finer next time. On the flip side, if it tastes overly bitter or harsh, that’s a classic sign of over-extraction, so go a little coarser.
Getting the Water Temperature Just Right
Water might seem straightforward, but its temperature is a hugely powerful tool. It directly controls which flavour compounds are extracted from the coffee. For the AeroPress, the sweet spot is generally between 85°C and 95°C.
This temperature range is perfect—it’s hot enough to pull out all the desirable sugars and acids without scalding the grounds and drawing out unwanted bitterness.
And you don't need a fancy temperature-controlled kettle to hit this mark, either. A brilliantly simple trick is to boil your kettle as normal, then just let it sit with the lid open for 60 to 90 seconds before you pour. That little pause is usually all it takes to bring the water down into that perfect brewing zone.
AeroPress Grind Size and Water Temperature Guide
To get you started, here’s a quick reference table for dialling in the two most important variables for your AeroPress. Think of these as a starting line, not a finish line.
| Variable | Recommended Starting Point | Description | Impact on Flavour |
|---|---|---|---|
| Grind Size | Medium-Fine (like table salt) | This provides a balanced surface area for efficient extraction during the short brew time. | Creates a sweet, clean cup. Finer grinds risk bitterness; coarser grinds can taste sour. |
| Water Temp | 85-95°C (off the boil) | This range extracts sweetness and complexity without introducing harsh, bitter notes. | Cooler water highlights bright acidity; hotter water enhances body and richness. |
Use this guide to build your intuition. Small adjustments to either grind or temperature can have a big impact on the final taste, so don't be afraid to experiment and find what you love.
Mastering the Classic AeroPress Method
Alright, this is where the magic happens. We’re going to walk through the classic, or standard, AeroPress method. Don't think of this as a rigid set of instructions, but more like a conversation between you, your coffee, and the brewer. The goal is to get a feel for the process, understand the 'why' behind each action, and eventually develop your own rhythm.
At its heart, this method is beautifully simple: you assemble the AeroPress upright over your mug, add coffee and water, give it a stir, and then gently plunge. It’s a straightforward approach that reliably delivers a clean, vibrant cup every time, making it the perfect starting point for any AeroPress newcomer.
This visual guide breaks down the simple, elegant flow of the brew, from that first pour to the final press.
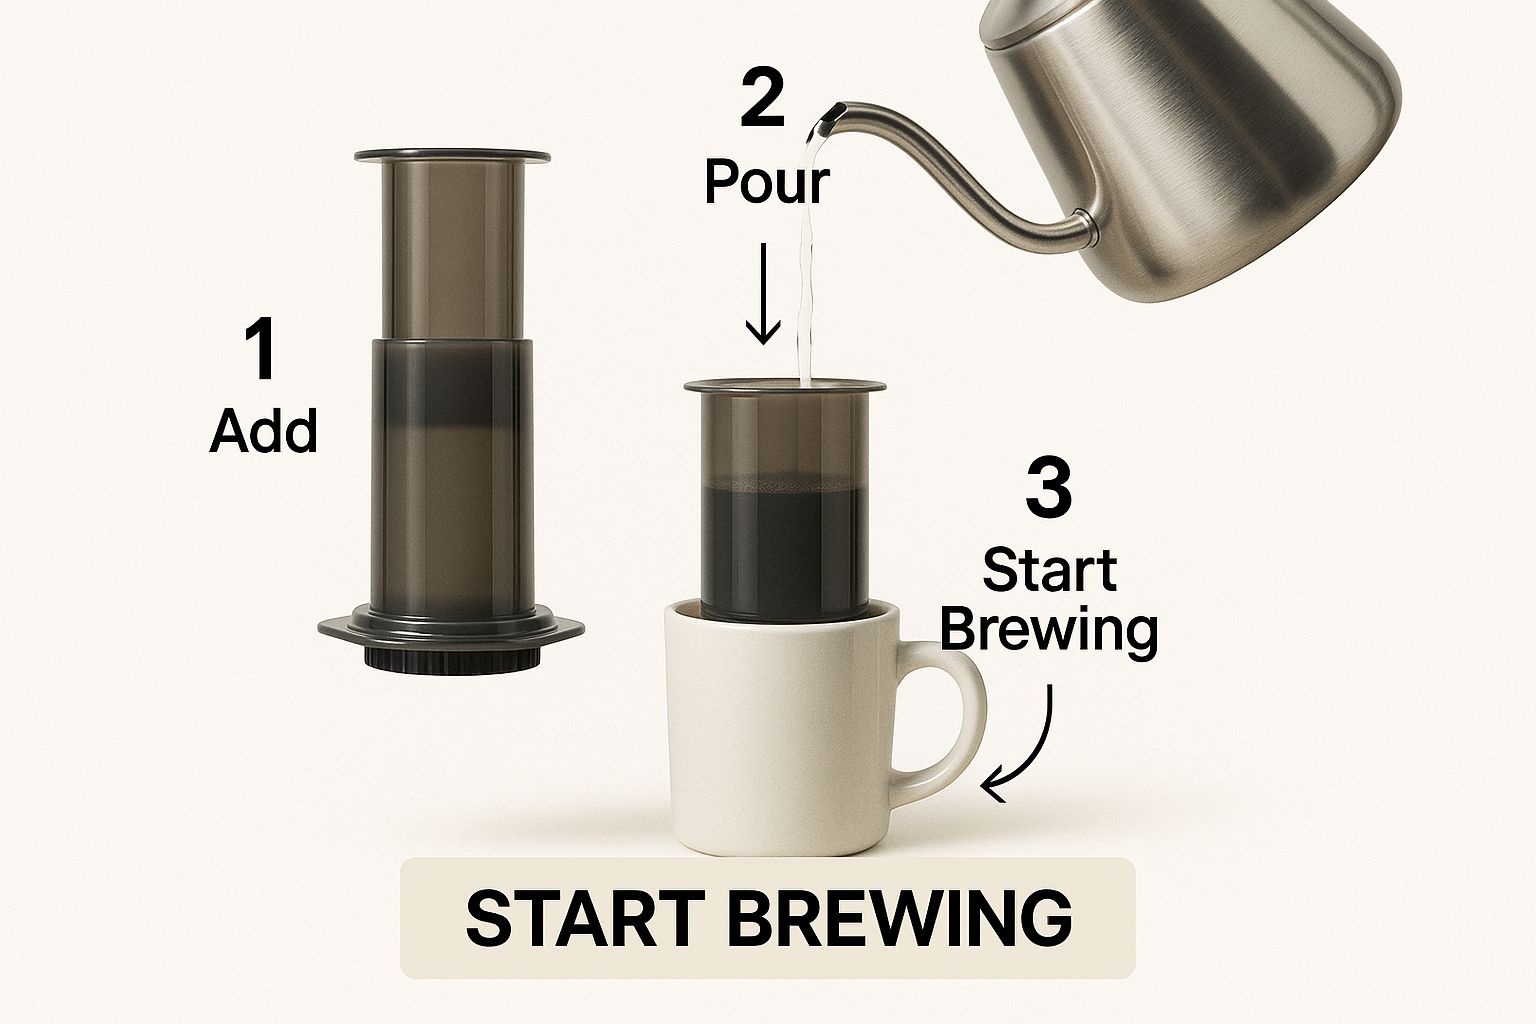
The image really captures the most crucial part of the process—that controlled pour of hot water. This is what kicks off the extraction and lays the foundation for all the flavour you're about to unlock.
Assembling for the Brew
First things first, let's get the brewer ready. Pop a single paper filter into the black filter cap.
A quick but important tip: give the filter a rinse with hot water from your kettle. This little step does two things. It washes away any potential papery taste from your final cup and helps the filter stick snugly to the cap, creating a much better seal.
Now, twist the filter cap securely onto the main brew chamber. Place the whole thing firmly on top of a sturdy mug. And that's it. You're looking at a fully prepped AeroPress, just waiting for the good stuff. Getting this simple setup right from the start ensures your brew is stable and leak-free.
The Brewing Ritual
With the brewer assembled, it's time to bring it to life. Tip your medium-fine ground coffee into the chamber. A dose somewhere around 15-18 grams is a fantastic starting point for a single cup. Give the chamber a gentle shake to level out the coffee bed; a flat surface is key for an even extraction.
Next, start your timer and begin pouring your hot water (aiming for that 85-95°C sweet spot) over the grounds. Pour steadily until the water hits the number 4 mark on the side of the chamber.
As soon as you're done pouring, give the slurry a good stir for about 10 seconds. This is vital for making sure all the coffee grounds are fully saturated and ready to release their flavour.
Your goal here is consistency. A thorough but gentle stir breaks up any clumps and guarantees every single coffee particle is doing its job. This brief bit of agitation makes a huge difference to the balance of your final cup.
Mastering the Plunge
After stirring, insert the plunger into the top of the chamber. This creates an airtight seal that conveniently stops coffee from dripping through before you're ready.
Now, you just have to wait. Let the coffee steep until your timer is at about the 1 minute 30 seconds mark. This immersion time is where all those deep, rich flavours are developed.
When your timer goes off, it's time to press. The key here is slow, steady pressure. You should aim for the plunge itself to take around 30 seconds. You'll feel a bit of resistance, but don't force it. Just apply consistent, light pressure with the palm of your hand.
You’ll know you’re done when you hear a satisfying hiss. That’s the sound of the last of the water being pushed through the coffee puck. Stop pressing the moment you hear it. Pushing any further just forces air through the grounds and can add unwanted bitterness to your cup.
Creating the Perfect Americano
What you have in your mug right now is a rich, delicious coffee concentrate. To turn it into a beautifully balanced Americano—a true UK café favourite—all you need to do is top it up with hot water.
How much water you add is completely up to you. A good starting point is a 1:1 ratio of concentrate to hot water, but feel free to play around with it. This final step opens up the flavour profile of the coffee, revealing all its nuances and creating a smooth, delicious drink you can be proud of.
Going Beyond the Classic: Exploring the Inverted Method and Other Recipes
Once you’ve got the classic AeroPress method dialled in, the real fun begins. This is where you graduate from simply following instructions to actively shaping the flavour in your cup. It’s time to start experimenting, and first up, we're turning things upside down—literally.
The inverted method is a rite of passage for almost every AeroPress owner. By flipping the brewer over, you take complete control of the brew time. With the standard method, a little water always drips through before you plunge. Inverting stops that completely, giving you a true full immersion steep for as long as you want.
What does that mean for your coffee? This total control usually leads to a richer, fuller-bodied cup with a more pronounced and complex flavour. It’s a simple tweak that unlocks a whole new world of brewing variables, making it perfect for teasing out every last note from a delicate single-origin bean.
Your Guide to the Inverted Method
Ready to give it a try? The whole process feels a bit strange at first, but you'll get the hang of it in no time. All it takes is a steady hand and a bit of confidence.
Here’s a straightforward way to approach it:
- Set the Plunger: Start by pushing the plunger into the main chamber, but only by an inch or two—just enough to create a stable, flat base.
- Flip and Fill: Turn the whole AeroPress upside down, so it's resting on the plunger. The numbers on the side will be upside down, which is exactly right. Now, add your ground coffee.
- Add Water and Stir: Start your timer and pour in the hot water, just like you would normally. Give it a quick but thorough stir to make sure all the grounds are wet.
- Steep and Secure: Let it steep for your desired time. This is your moment to experiment! When the time is up, securely screw the filter cap (with a rinsed paper filter inside) onto the chamber.
- The Big Flip: This is the part that feels a little daring. Place your mug upside down over the filter cap. Then, holding the mug and brewer firmly together, flip them both in one smooth, confident motion. Now you're ready to press slowly for around 30 seconds.
A Quick Word on Safety: Before you flip, double-check that the filter cap is screwed on tight. When you perform the flip, grip both the brewer and the mug securely. A single, decisive movement is much safer than a hesitant one.
How to Make an Espresso-Style Shot
One of the AeroPress’s most-loved tricks is its ability to produce a short, highly concentrated shot of coffee. It’s not true espresso, but it’s a brilliant base for making your own flat whites, lattes, or cortados at home.
For this, you’ll need a much finer grind—getting close to an espresso consistency—and a tight coffee-to-water ratio. A great starting point is 18 grams of coffee to just 60 grams of water. The plunge needs to be forceful and quick, aiming for about 20-25 seconds. You’ll be rewarded with a powerful, syrupy shot of coffee, ready for some perfectly steamed milk.
A Speedy AeroPress Cold Brew
For those rare but wonderful sunny British afternoons, the AeroPress can even whip up a fantastic cold brew concentrate. Best of all, you don't have to wait 12-24 hours for it.
Just use the inverted method with a medium grind, but swap the hot water for room-temperature filtered water. You’ll need to let it steep for much longer—somewhere between 5 and 8 minutes should do it. Once steeped, flip and plunge directly over a glass full of ice. The result is a beautifully smooth and refreshing cold brew without the agonising wait. Top it up with cold water or milk to taste.
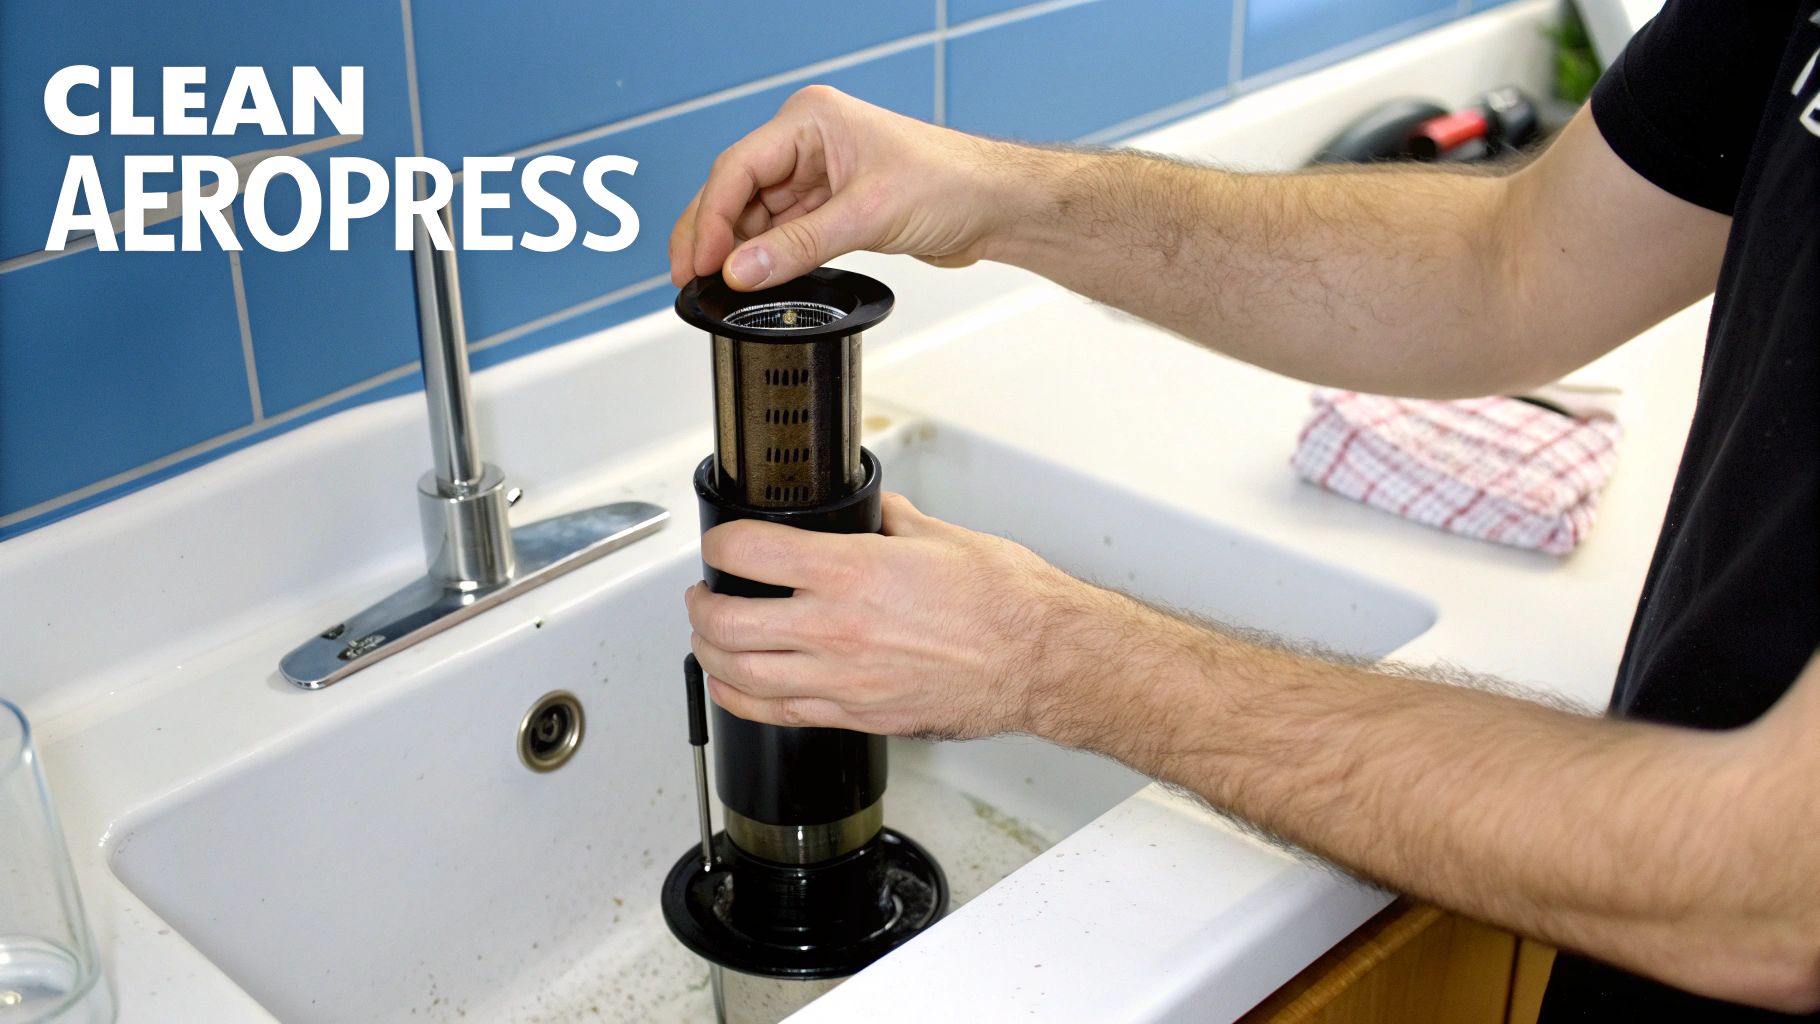
Effortless Cleanup and Everyday Maintenance
After that last, perfect sip, you’re left with one of the AeroPress’s most-loved features: a cleanup so easy it almost feels like a cheat code. Forget scrubbing filters or wrestling with fiddly parts. This is where the brewer truly shines, making it a perfect fit for a busy lifestyle where time is everything.
The whole process centres around one deeply satisfying moment – the famous ‘puck pop’. Just unscrew the filter cap over your compost or rubbish bin and push the plunger the rest of the way. The spent coffee grounds and paper filter shoot out in a single, dry puck. It’s clean, it’s fast, and it’s brilliantly simple.
This incredible ease of use is a massive reason for its popularity, especially for those in small city flats or needing a quick brew at the office. Its rapid, no-mess cleanup makes it the go-to choice for anyone who wants great coffee without the fuss, a point you can dive into deeper with this helpful AeroPress coffee guide.
Keeping Your Brewer in Top Condition
Long-term care is just as straightforward. Once the puck is out, a quick rinse of the rubber plunger seal under the tap is usually all it needs. The durable materials are built to last for years, making it the ultimate travel brewer for any UK adventure, from camping in the Cairngorms to a weekend away.
Over time, you might notice the rubber seal feels a bit compressed or loose. This is totally normal after hundreds of brews. Thankfully, replacements are cheap, easy to find, and simple to fit, giving your brewer a new lease of life for just a few pounds.
To keep it in pristine shape:
- Rinse It Straight Away: Always give the plunger seal a quick rinse with water right after you've used it.
- Store It Smart: Never store the plunger fully pushed inside the chamber. This stops the rubber seal from being constantly compressed, helping it last much longer.
- Give It a Deep Clean Now and Then: For a more thorough clean, all the parts are dishwasher-safe (top rack only). Alternatively, you can just wash them with a bit of warm, soapy water.
Common AeroPress Questions Answered
Even a brewer as friendly as the AeroPress can leave you with questions. That's a good thing—it means you're really paying attention to what's in your cup. Let's tackle some of the most common queries we hear from UK coffee lovers, so you can troubleshoot with confidence and nail your technique.
Getting your brew just right is usually a game of small adjustments. Don’t think of it as just following a recipe; you're learning a new skill. Before you know it, your palate will be telling you exactly which way to go.
Why Does My AeroPress Coffee Taste Bitter or Sour?
This is almost always an extraction issue, and it's the number one hurdle for new brewers. If your coffee has a harsh, unpleasantly sharp bitterness, you’ve over-extracted it—basically, you've pulled too much of the soluble stuff from the grounds. To fix it, try a slightly coarser grind or drop your water temperature by a few degrees.
On the flip side, if the coffee tastes sour, tangy, or a bit thin and lifeless, that’s a classic sign of under-extraction. You haven't pulled enough flavour out. The simple fix here is to go for a finer grind (which increases the coffee's surface area) or use slightly hotter water to give your brew a bit more oomph.
When you're trying to fix your brew, only ever change one thing at a time. Keep your dose of coffee the same and just tweak either the grind or the water temperature. It's the only way to know for sure what's actually making the difference.
Can I Brew More Than One Cup at a Time?
The AeroPress is built for a single serving, but there’s a great little workaround for when you’ve got company. The trick is to brew a really strong, concentrated shot of coffee and then simply dilute it.
Use your normal amount of coffee grounds but with much less water—a ratio of around 1:5 (for example, 18g of coffee to 90g of water) works wonders. Once you’ve plunged, just split this rich concentrate between two mugs and top them both up with hot water. You’ve just made a pair of delicious Americanos.
Do I Need Specialised Brewing Gear?
While having a full barista setup is fun, it's definitely not essential for making incredible coffee with an AeroPress. You can get your water to the right temperature just by letting a boiled kettle sit for a minute or two before you pour.
That said, the single biggest upgrade you can make to your coffee game is a good-quality burr grinder. It gives you a much more consistent grind size than a blade grinder, which is key to an even, balanced extraction. If you’re not ready to buy one, just ask your local UK roaster to grind your beans for AeroPress when you pick them up.
Ready to put these tips into practice with coffee that truly shines? Explore the exceptional range of freshly roasted beans at Ue Coffee Roasters and discover the perfect partner for your AeroPress adventures at https://www.uecoffeeroasters.com.