

Upgrade Your Office Coffee With The Perfect Pump For Syrup
A simple pump for syrup is the secret weapon for replacing messy, inconsistent pours with a clean, professional, and personalised coffee experience. It’s a small change that can completely elevate the daily coffee ritual, turning the standard break room into a proper café-style destination for your team.
Transform Your Break Room Into a Cafe
Imagine the creative energy when your office coffee corner becomes a genuine perk—a place where staff can craft their perfect drink with total precision. That upgrade starts with a simple but profoundly effective tool: the right pump for syrup.
Moving beyond sticky bottles and guesswork isn't just about cleanliness. It's a powerful statement about how much you value your team's daily experience.
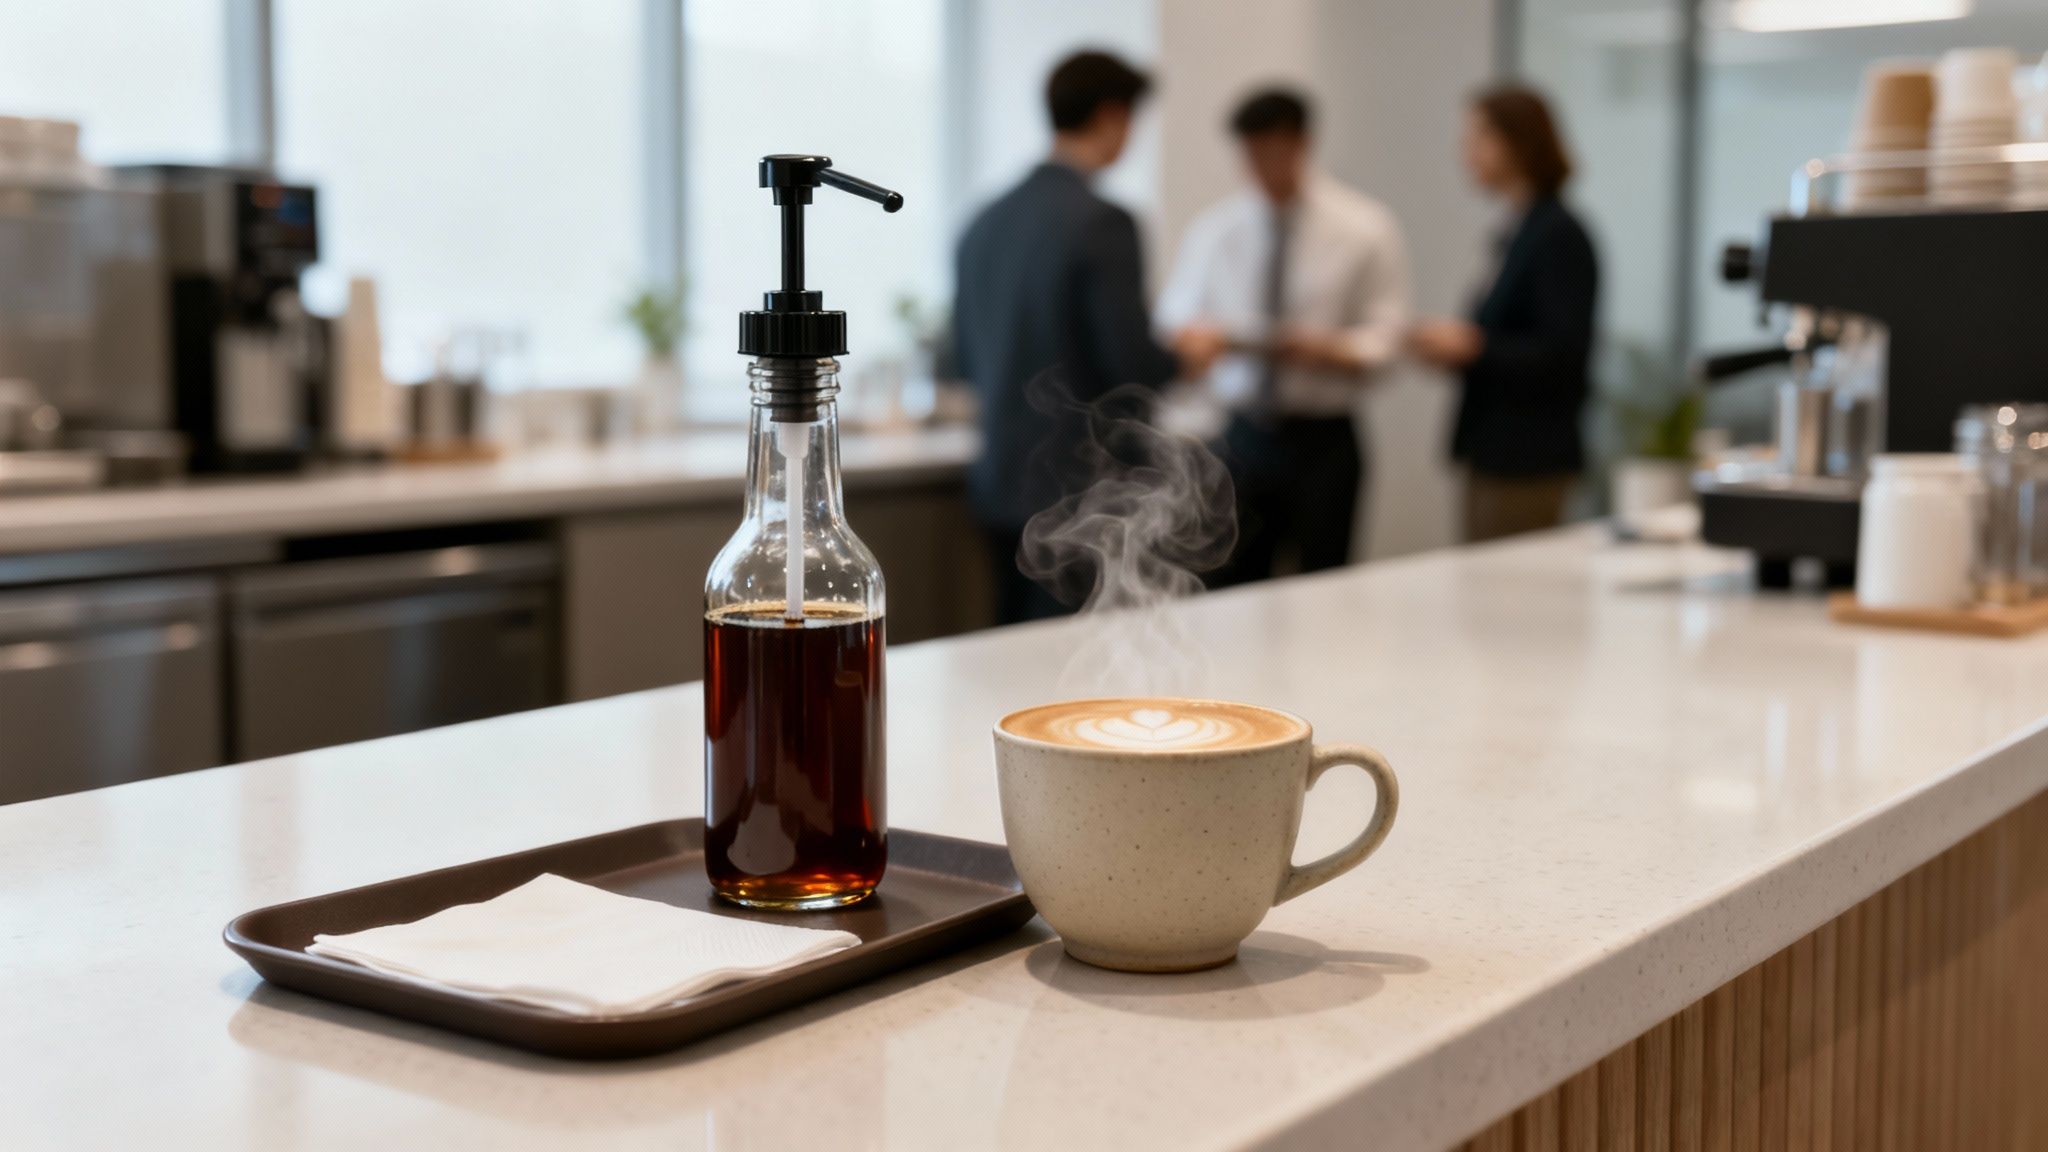
This single addition unlocks a new level of professionalism. By providing a consistent, measured dose of flavour—whether it’s vanilla, caramel, or hazelnut—you empower everyone to become their own barista. This consistency is what eliminates wasted syrup and disappointing drinks, guaranteeing a high-quality beverage every single time.
Elevating the Daily Ritual
The impact of this upgrade goes far beyond the coffee cup. It sends a clear signal that the small details matter and that the company is genuinely invested in improving the workplace culture. A well-organised, premium beverage station can do wonders for morale and spark those moments of connection between colleagues.
- Boosts Morale: Offering high-quality options makes employees feel genuinely appreciated.
- Enhances Professionalism: A clean, organised station reflects well on the company, especially when clients or visitors are around.
- Promotes Consistency: Everyone gets the same perfect amount of flavour, ensuring a great-tasting drink with every cup.
A well-equipped beverage station is a cornerstone of modern office hospitality. It transforms a simple coffee break into a moment of genuine appreciation, fostering a more positive and productive work environment.
Of course, when you’re designing your break room's new café experience, selecting the right commercial coffee machine is just as crucial as choosing the perfect syrup pumps. The equipment has to work together to create a seamless system.
It’s time to say goodbye to sticky counters and mismatched flavours. A clean, efficient, and inspiring setup turns every coffee break into a celebrated ritual, fostering a culture of satisfaction that ripples through the entire workday.
Picking The Right Pump For Your Syrups
Choosing a syrup pump isn't as simple as finding one that screws onto the bottle. For a busy office or hospitality space, the right pump is the difference between a frustrating, sticky mess and a smooth, consistent experience. It’s a small detail that makes a huge impact on hygiene, efficiency, and the quality of every drink served.
First things first, you need to think about the material. This decision boils down to longevity and cleanliness—two absolute essentials in any shared environment. You’re essentially choosing between the workhorse practicality of food-grade plastic and the premium, durable feel of stainless steel.
Material Matters For Durability And Hygiene
Food-grade plastic pumps are the go-to for many beverage stations. They're affordable, lightweight, and won’t corrode, even with more acidic fruit syrups. The only real downside is that they can pick up stains over time, especially from intensely coloured syrups like raspberry or blackcurrant.
On the other hand, stainless steel pumps bring a sleek, professional look to your coffee bar. They are incredibly durable, almost impossible to stain, and a breeze to sanitise, making them a fantastic choice for high-traffic areas where looks and hygiene are paramount. Yes, the initial cost is higher, but their robust build means they’ll outlast plastic equivalents many times over.
The material you choose really sets the tone for your whole beverage station. While plastic gets the job done affordably, stainless steel communicates a commitment to quality and longevity that your team or customers will definitely notice.
To help you decide at a glance, here’s a quick comparison of the two main options for office use.
Syrup Pump Feature Comparison For Office Use
This quick-glance guide helps you select the ideal pump based on material, dosage, and compatibility for your workplace needs.
| Feature | Food-Grade Plastic Pump | Stainless Steel Pump |
|---|---|---|
| Material | Lightweight, corrosion-resistant plastic | Heavy-duty, corrosion-resistant stainless steel |
| Durability | Good; can become brittle or stained over time | Excellent; built for long-term, high-volume use |
| Hygiene | Easy to clean, but can absorb colours/odours | Very easy to sanitise; non-porous and stain-resistant |
| Aesthetics | Functional and practical | Sleek, professional, and premium |
| Typical Dosage | 7.5ml, 10ml | 7.5ml, 10ml |
| Best For | Budget-conscious setups, lower-volume use, acidic syrups | High-end coffee stations, high-traffic areas, aesthetics |
| Initial Cost | Low | High |
Ultimately, the choice depends on your priorities. For a simple staff kitchen, plastic is often sufficient. For a client-facing coffee bar or a busy self-serve machine, stainless steel is a worthy investment.
Ensuring a Perfect Fit Every Time
One of the most common frustrations is a pump that doesn't quite fit the bottle properly. It leads to leaks, sticky countertops, and wasted syrup. A secure, airtight seal is what keeps the syrup fresh and flavourful, and getting it right just takes a moment.
Before you buy, grab a ruler and measure two things:
- The Bottle Neck Diameter: Measure the opening of your syrup bottle from outer edge to outer edge. This ensures the pump's collar will screw on tightly without any gaps.
- The Bottle Height: Measure from the bottom of the bottle to its shoulder (right where the neck begins). This tells you if the pump's dip tube is long enough to reach the bottom and get every last drop.
Taking these two quick measurements saves you a world of hassle. It guarantees a leak-proof fit and makes sure you're not throwing away half-full bottles.
Mastering The Dose For Perfect Consistency
The most important factor for getting flavour right is the pump dosage—sometimes called the 'throw' or 'shot'. This is the precise amount of syrup you get with each full press, usually 7.5ml or 10ml.
Choosing the right dosage is the secret to a reliable drinks menu. A 7.5ml pump is often perfect for adding a subtle hint of vanilla to a standard latte. For a bolder caramel flavour in a larger drink, a 10ml pump is probably the better choice.
Why is this so critical?
- Consistency: It means a "two-pump caramel latte" tastes exactly the same, no matter who's making it. No more guesswork.
- Cost Control: A measured dose stops people from over-pouring, which helps you manage your stock and cut down on waste.
- Quality Experience: It empowers everyone to make perfectly balanced, delicious drinks every single time.
When you nail this, your pump for syrup stops being just a dispenser and becomes a tool for creating an effortless, reliable system that delivers excellence with every press.
Flawless Installation And Priming
When you unbox a new syrup pump, it’s the start of something better – a more consistent, reliable coffee experience for everyone. Getting the setup right is simple, but crucial. Anyone on your team should be able to get a new flavour ready for service in just a few minutes.
It all boils down to three key actions: trimming the tube to the perfect length, securing the pump for an airtight seal, and priming it so that first pour is perfect.
Customising The Dip Tube Length
That long plastic tube that comes with your pump? It's deliberately made too long so it can fit a range of different bottle sizes. Your first job is to trim it down for a perfect, custom fit. If you leave it too long, it will just bend at the bottom of the bottle, trapping syrup and causing frustrating suction issues.
It's an easy fix. Just hold the tube against the outside of your syrup bottle and mark where it meets the very bottom. Then, grab some scissors and snip it off at a 45-degree angle.
This angled cut is a small trick with a big payoff. It stops the tube from creating a seal against the bottom of the bottle, which means you get a smooth, steady flow right down to the last drop.
A perfectly trimmed dip tube is the secret to zero waste. That small angled cut ensures you can access every last bit of syrup, maximising your investment and keeping your beverage station running efficiently.
The infographic below breaks down the simple workflow to get your pump ready for action.
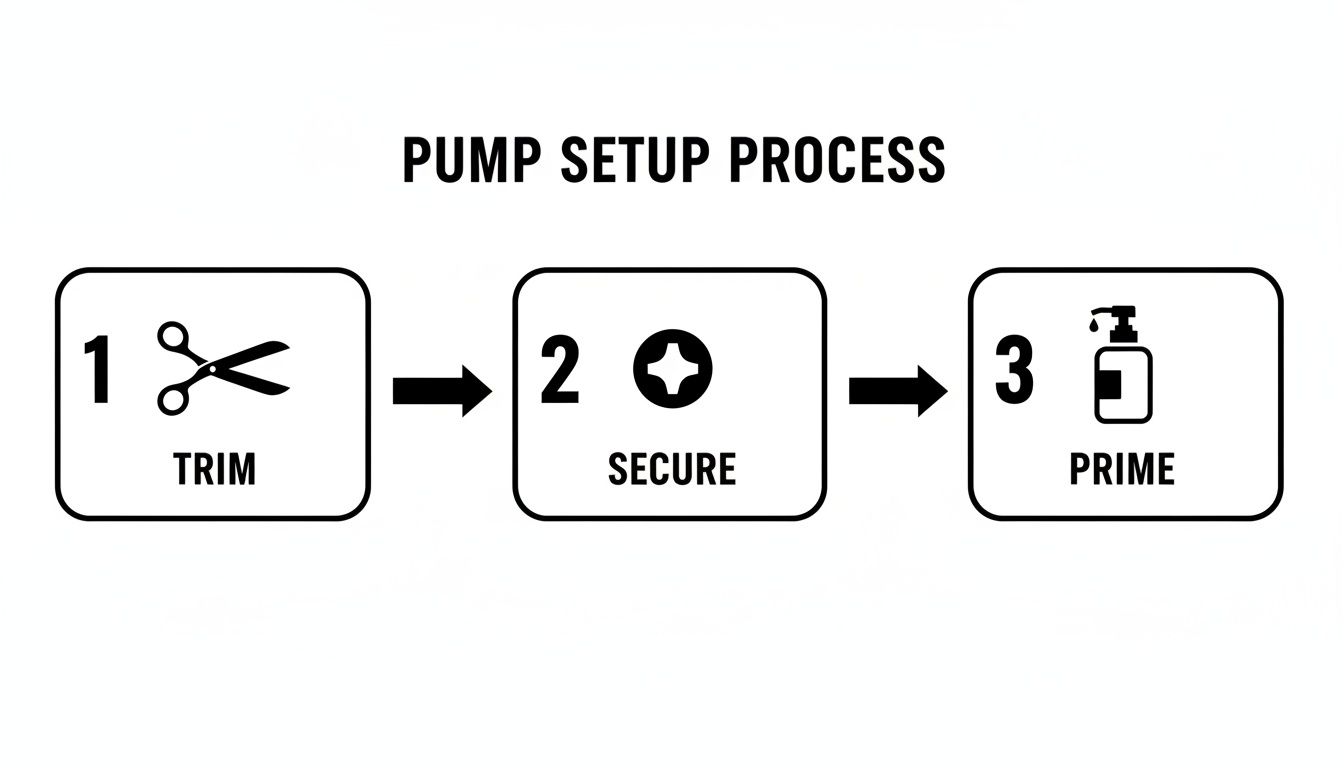
This quick visual guide shows the three core steps—Trim, Secure, and Prime—that are the foundation of a perfect pump installation.
Securing A Perfect Airtight Seal
With the tube trimmed, pop it into the pump mechanism and then place the whole assembly into the syrup bottle. Now for the seal. Screw the collar down firmly until it’s snug. You don't need to wrench it on, but a good, tight fit is essential to stop air from getting in and sticky syrup from leaking out.
This seal does two very important jobs:
- Keeps it fresh: It protects the syrup from the air, preserving its flavour and quality for much longer.
- Stops the mess: A tight seal prevents those annoying drips that form around the neck of the bottle, keeping your counters clean.
A proper seal also creates the vacuum the pump needs to work properly, stopping it from sputtering and ensuring every dose is smooth and complete.
The Essential Priming Process
Before you can start making drinks, you have to prime the pump. All this means is clearing the air out of the tube and the pump chamber and filling it with syrup instead.
With the pump screwed securely onto the bottle, just press the head down firmly a few times. At first, you’ll feel almost no resistance because you’re just pushing air. After a few presses – usually somewhere between four and six pumps – you’ll feel the resistance build as the syrup starts to work its way through the mechanism.
Once you get a full, steady stream of syrup coming out of the nozzle, you’re done. The pump is officially primed and ready to go. This simple step makes sure that the very first dispense for a customer or colleague is a perfect, measured dose – not a disappointing spurt of air. Now you’re ready to make some fantastic drinks.
Keeping Your Syrup Pumps Clean And Hygienic
A pristine, inviting beverage station is the heart of any great workplace break room or hospitality setup. But let's be honest—sticky nozzles and clogged pumps can quickly ruin that premium experience. The good news is that keeping your equipment in top shape is simpler than you might think.
A straightforward cleaning routine is all it takes to make sure every pour from your pump for syrup is as perfect as the last. This isn't just about appearances; it's about hygiene, preventing frustrating blockages, and guaranteeing a consistently great taste for your team or customers. A little daily attention really does go a long way.
Building Your Cleaning Routine
The easiest way to stay on top of maintenance is to build a simple schedule. This removes the guesswork and makes it easy for anyone to keep the beverage area in top condition. I always recommend thinking of it in three tiers: daily touch-ups, weekly checks, and a proper deep clean every time you switch out a bottle.
- Daily Wipe-Down: At the end of each day, grab a clean, damp cloth and wipe the nozzle and pump head. It only takes a few seconds but stops that sticky build-up that attracts dust and germs.
- Weekly Check: Once a week, give the entire pump and bottle a quick look over. You're just checking for any leaks around the collar and making sure the pump action still feels smooth and responsive.
This simple rhythm is your first line of defence, stopping minor issues from turning into bigger problems down the line.
Performing A Full Deep Clean
When a syrup bottle runs empty, that’s your cue for a full deep clean. This is the single most important step for maintaining the pump's longevity and ensuring pure flavour with every new bottle. If you skip this, you’re inviting crystallised sugar to clog the internal mechanism—one of the most common reasons a pump for syrup gives up the ghost.
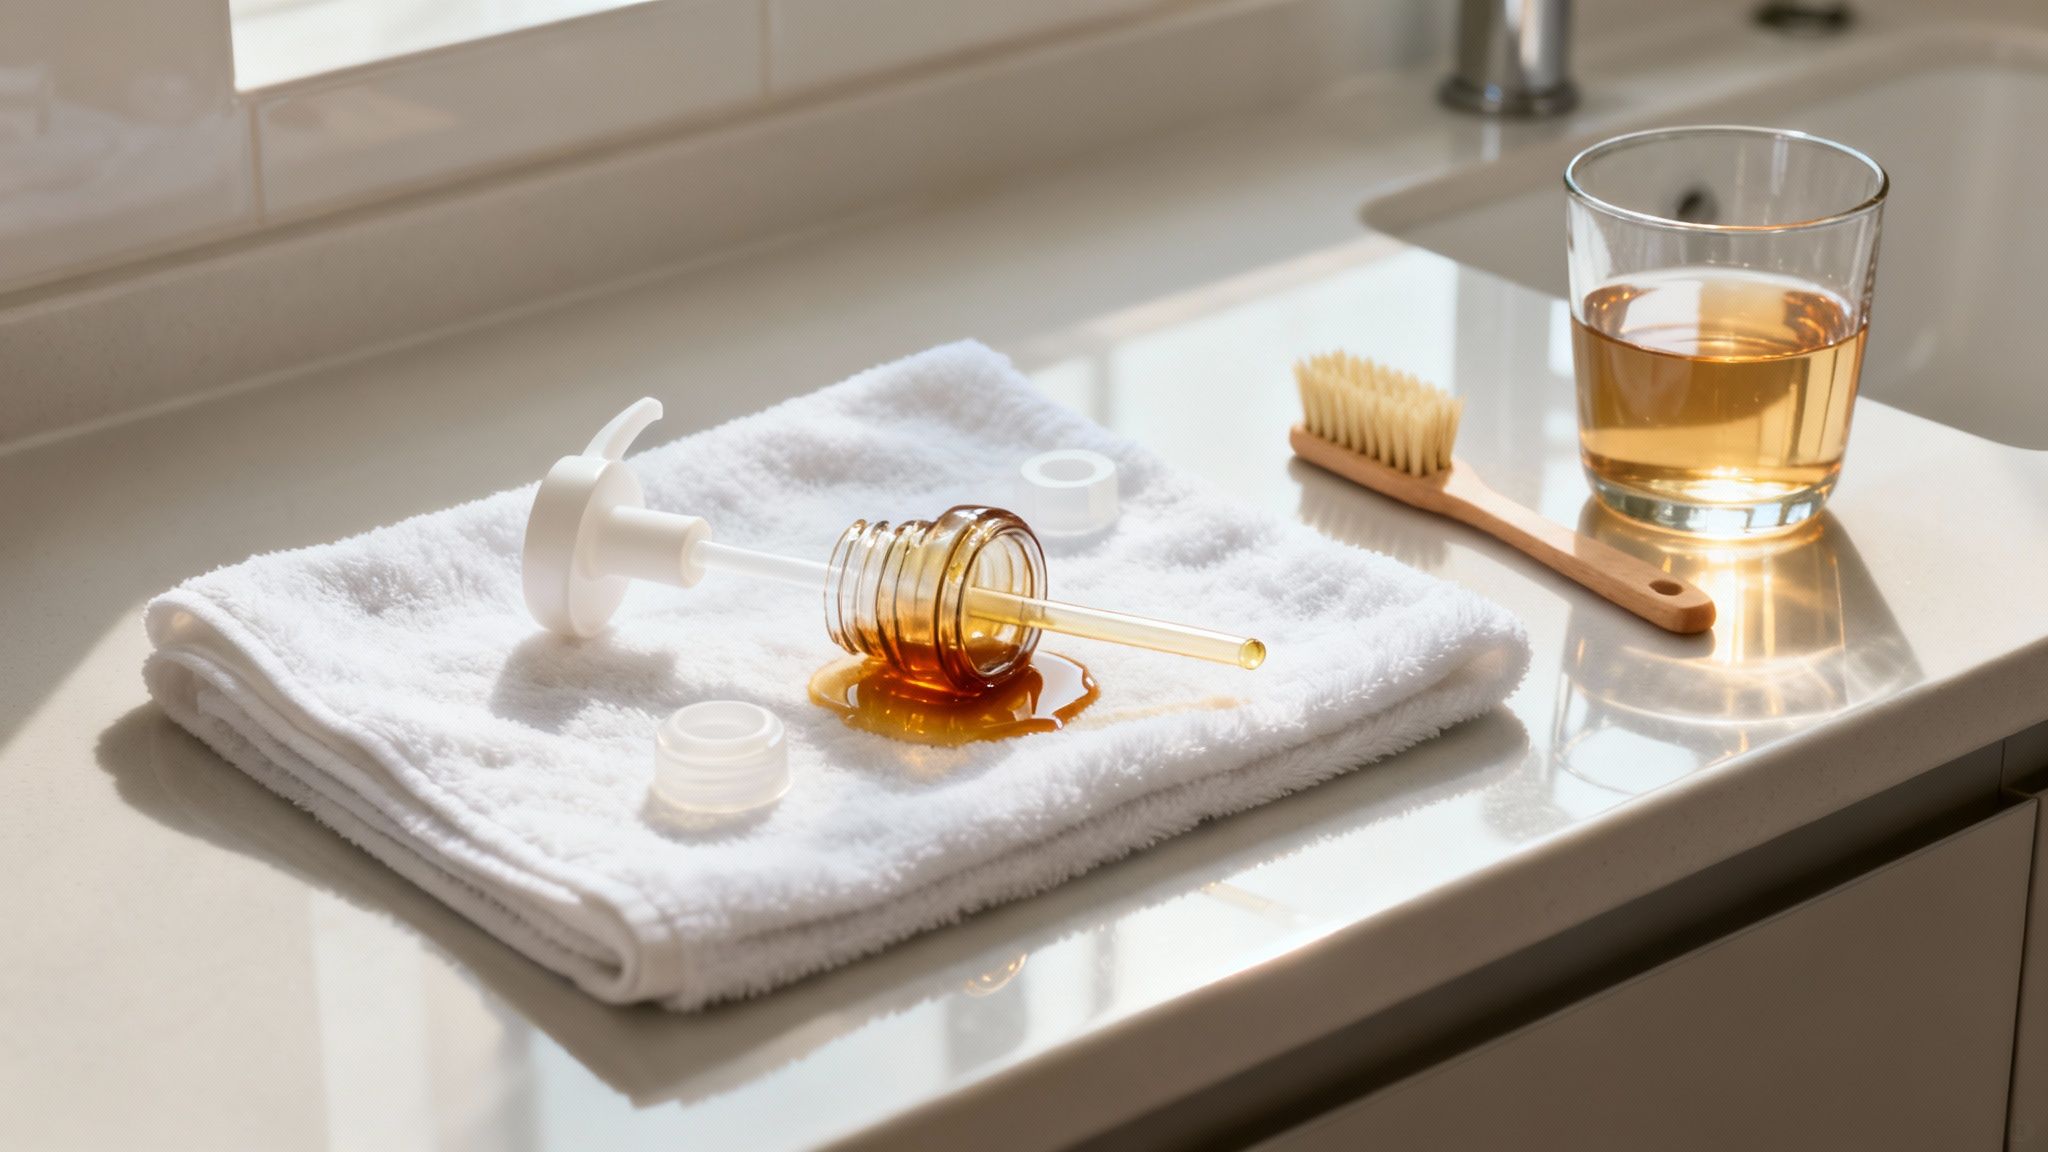
First things first, take the pump apart completely. Unscrew the head from the collar, pull out the dip tube, and separate any other bits and pieces. You should have a few separate parts ready for a good wash.
Next, get a basin of warm, soapy water ready. Submerge all the components and just let them soak for about 10-15 minutes. This does the hard work for you, dissolving any stubborn, sugary gunk that has built up inside the pump’s chamber and tube.
A thorough flush with warm water is your secret weapon against crystallisation. Sugar is the number one cause of pump clogs, and a regular flush keeps the mechanism clear and the syrup flowing freely, which will dramatically extend the life of your equipment.
After a good soak, it's time to flush the mechanism. Put the pump head back together and submerge the bottom of the dip tube in the warm water. Now, pump the water through the nozzle over and over again until it runs completely clear and the action feels nice and smooth.
Once it's flushed, rinse every component under clean running water to get rid of any soap residue. Lay all the parts on a clean towel and let them air dry completely. This is a critical final step—any trapped moisture can compromise the quality of the new syrup. Once everything is bone dry, you can reassemble it, confident you have a hygienic, perfectly functioning pump for your next bottle.
Troubleshooting Common Pump Problems
Even the most dependable bit of kit can have an off day. When your pump for syrup starts acting up, it can throw a real spanner in the works, disrupting your beverage service and causing headaches for your team. The good news? Most common issues are surprisingly simple to sort out, getting you back up and running in minutes.
The trick is to see troubleshooting not as a chore, but as a chance to get to know your equipment a little better. With a few quick checks, you can usually diagnose and fix the problem yourself, making sure your coffee station stays a reliable hub of efficiency and enjoyment. Don't let a small hiccup derail a great coffee experience.
Tackling The Dreaded Clog
By far the most common villain in the world of syrup pumps is crystallised sugar. It’s inevitable. Over time, syrup residue hardens inside the mechanism, leading to a complete blockage. If you press the pump and nothing comes out, or it feels totally solid, this is almost certainly the culprit.
Thankfully, the fix is straightforward. Just remove the pump from the bottle and pop the lower half, including the dip tube, into a container of very warm (not boiling!) water. Let it soak for a good 15-20 minutes to give the sugar crystals a chance to dissolve.
After its bath, pump the warm water through the mechanism repeatedly until it flows freely. This will flush out any stubborn residue and clear the blockage.
Solving Sputtering and Inconsistent Pours
Is your pump delivering a sad little spurt of air followed by a dribble of syrup? It’s a frustrating issue, and it almost always points to an air leak or a priming problem. It means the pump can't create the vacuum it needs for a smooth, consistent dose.
Start with the simplest check: is the pump's collar screwed on tightly to the bottle? A loose seal is a surprisingly common cause, as it allows air to be drawn into the system instead of syrup.
If the seal is tight, the pump may have just lost its prime. This often happens if the syrup level gets very low or if the pump has been sitting unused for a while. To fix it, simply press the pump head down firmly and repeatedly (4-6 times) until you get a full, uninterrupted stream of syrup.
An inconsistent pour is a sign that your pump is working against itself. Re-establishing a proper seal and a solid prime restores the internal vacuum, allowing the pump to deliver the flawless, measured dose it was designed for.
When The Pump Gets Stuck Or Fails To Rebound
Sometimes a pump will press down just fine but won’t spring back up on its own. This sluggish action usually means one of two things: a clog is just starting to form, or the internal spring mechanism is gummed up with thick, sticky syrup.
Your first move should be the warm water flush we described for clogs, as this often does the trick. If that doesn't sort it, disassembling the pump for a deep clean is the next logical step.
If cleaning still doesn't work, take a closer look at the components:
- The Spring: Check that the internal spring is clean and isn't damaged or warped.
- The Ball Bearing: Some pumps have a small ball that acts as a check valve. Make sure it's clean and can move freely within its housing.
Giving these small parts a thorough clean can restore that snappy, responsive action, making every pump feel as good as new.
Got Questions About Syrup Pumps? We've Got Answers
So you're setting up a fantastic new coffee and syrup station for the office. It’s an exciting step, but as with any new kit, a few practical questions are bound to pop up. Don't worry, getting the hang of your syrup pumps is straightforward with the right advice.
We’ve pulled together the most common queries we hear from businesses just like yours. Think of this as your cheat sheet for keeping everything flowing perfectly, so your coffee corner is always a source of delight, not drama.
How Often Should I Clean a Pump in a Busy Office?
In a high-traffic spot, a little daily upkeep makes all the difference. Get into the habit of giving the nozzle a quick wipe with a clean, damp cloth at the end of each day. This simple step stops sticky residue from building up.
Beyond that, a full, deep clean is non-negotiable every time you swap out a syrup bottle. This means taking the pump apart, flushing it with warm water until it runs crystal clear, and letting all the pieces air dry properly. It’s a simple routine that prevents any flavour mix-ups and stops sugar from crystallising and causing clogs.
Can I Use One Pump for Different Syrup Flavours?
Technically, you could, but we’d strongly advise against it. To get a pure, untainted taste every single time, you really need to dedicate one pump to each flavour.
Imagine the disappointment of tasting a bit of hazelnut in what’s meant to be a classic caramel macchiato. It just ruins the experience. Using separate pumps is a small thing, but it protects the integrity of each flavour and delivers the quality your team expects.
This approach also makes changing bottles much faster and easier – no deep cleaning required, just a quick swap.
My Syrup Pump Is Clogged. How Can I Fix It?
A clog is almost always down to hardened, crystallised sugar gumming up the works. It's a common issue, but thankfully, it’s usually an easy fix.
If you find your pump is blocked, here’s what to do:
- Give It a Soak: Take the pump out of the bottle and pop the whole bottom section, tube and all, into a cup of hot (but not boiling) water for about 20 minutes.
- Pump It Out: After it's had a good soak, start pumping the hot water through the mechanism. You should feel the blockage start to break up as the water starts flowing freely again.
- Rinse and Dry: Once it's clear, just give it a final rinse with some cool, clean water and let it air dry completely before putting it back into service.
This quick reset will dissolve any stubborn sugar crystals and get your pump working like new again.
Ready to create a truly exceptional beverage experience in your workplace? UE Coffee Roasters provides everything you need, from premium syrups and pumps to state-of-the-art bean-to-cup machines. Explore our complete office refreshment solutions.