

How to Steam Milk Perfectly for Speciality Coffee
Properly steaming milk is where the real magic happens in the UK's speciality coffee scene. It's the step that turns a simple espresso into something truly special – a velvety, sweet, and glossy microfoam that feels like pure luxury. This isn't just about heating; it's a craft that can elevate your daily brew from good to absolutely exceptional.
The Secret to Cafe-Quality Coffee at Home
Welcome to the heart of what makes speciality coffee so incredible. Learning to steam the milk properly is a genuine game-changer for any coffee enthusiast, especially here in the UK where our love for a good flat white or latte runs deep.
Forget just making milk hot. We're about to dive into the craft of creating that silky, luscious texture that defines a professionally made coffee. When you introduce steam, you're doing more than just warming things up; you're fundamentally changing the milk's structure. The fats and proteins break down, creating a natural sweetness and a rich mouthfeel that you just can't get from a microwave or a saucepan.
Embracing the Craft
Mastering this skill is a wonderfully hands-on process that connects you more deeply with the coffee you drink. It takes a bit of patience and practice, but the reward is immense. Think of this as your first real step toward becoming a confident home barista, unlocking a whole new level of coffee craftsmanship right in your own kitchen.
The goal here isn't just heated milk; it's beautifully textured milk. We're chasing that 'wet paint' consistency—a glossy, smooth liquid with no visible bubbles. It’s the kind of milk that pours like silk and melds perfectly with your espresso.
The UK's passion for great coffee has put milk centre stage. In fact, UK dairies processed a staggering 1,206 million litres of milk in a single recent month. A huge chunk of that goes into creating the lattes and flat whites that have become staples of our modern coffee culture. You can dive deeper into the official stats on UK milk usage on gov.uk.
I've designed this guide to do more than just teach you a technical skill; I want to inspire you to connect with the rich coffee culture we all love. With the right technique and a bit of practice, you can easily recreate that professional café experience and turn your home into your new favourite coffee spot.
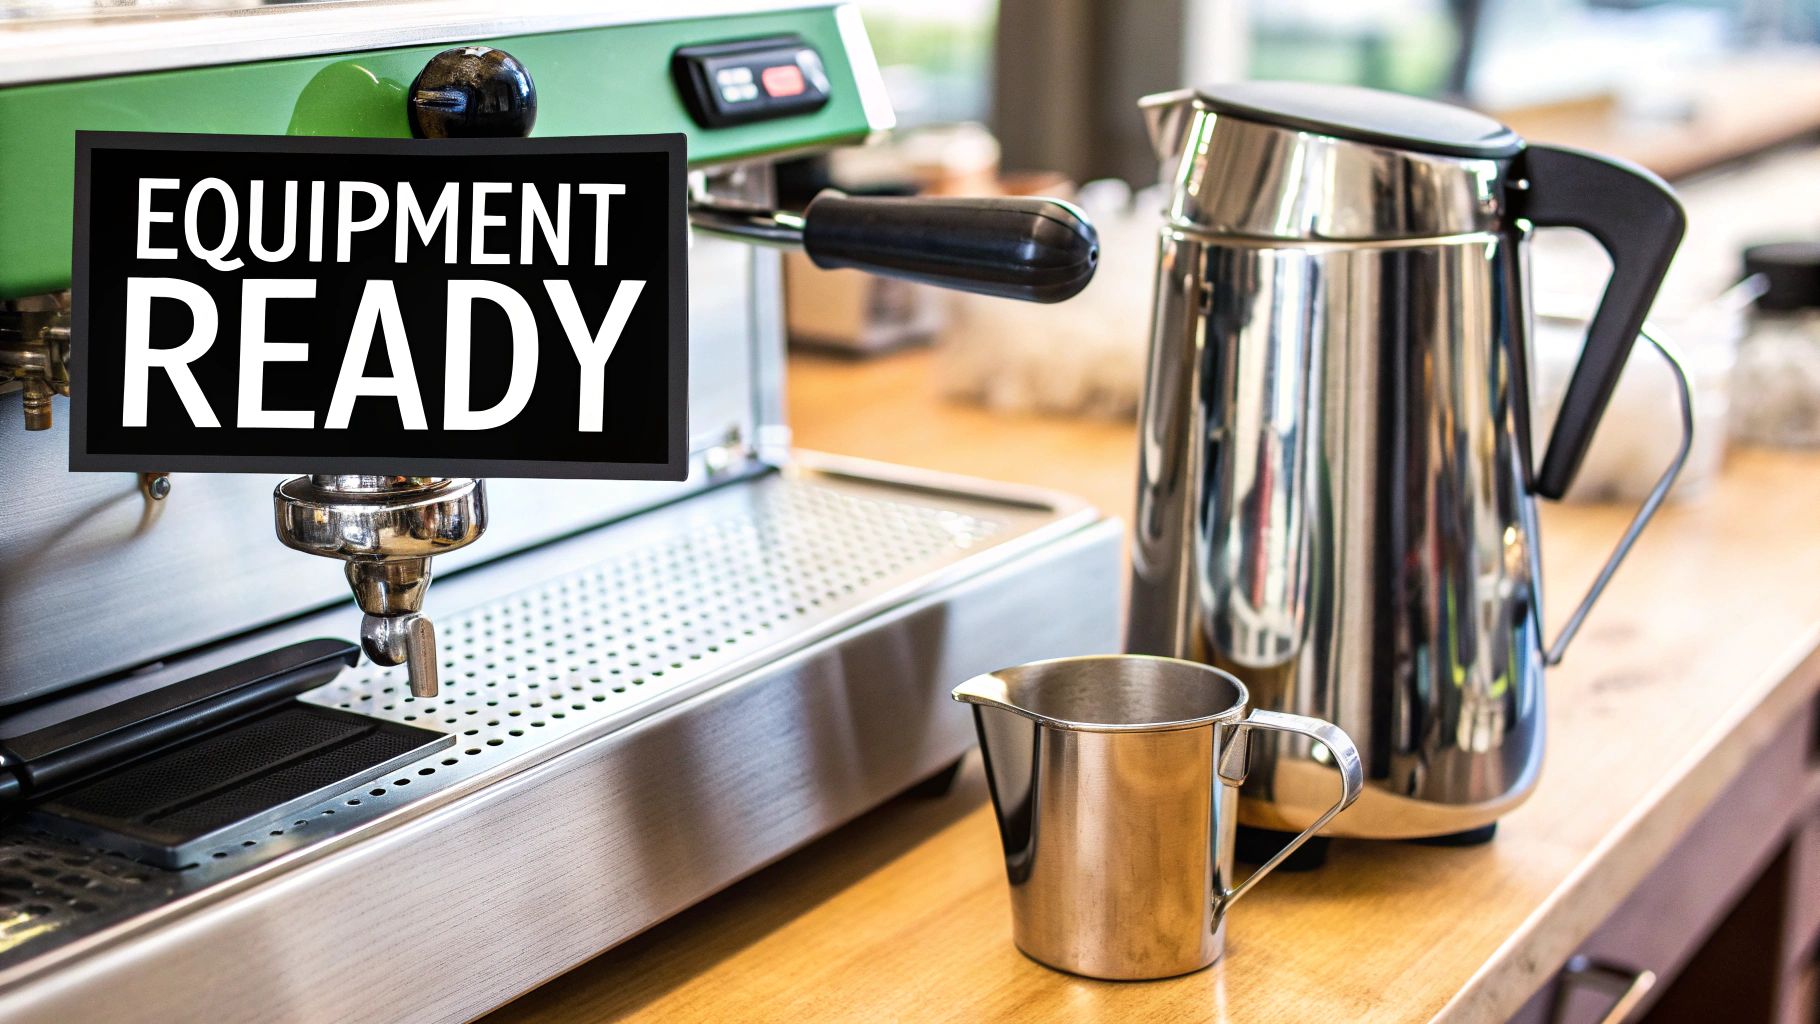
Getting Your Milk Steaming Toolkit Ready
Before we even think about turning on the steam, let's talk about setting ourselves up for success. Having the right kit isn't just about ticking boxes; it's about understanding how each piece contributes to that silky, perfect microfoam. Think of this as a barista's mise en place—everything in its right place for a flawless performance.
The journey to beautiful steamed milk starts, perhaps obviously, with the milk itself. It's the protein in the milk that gives us the structure for the foam, while the fat delivers that rich, satisfying mouthfeel and flavour. Here in the UK, we’re lucky to have an incredible dairy industry right on our doorstep.
In fact, Great Britain's milk production is forecast to hit around 12.43 billion litres for the year. Even with fluctuations in weather and prices, the demand from coffee lovers and brilliant cafés means we always have access to top-quality milk. If you're curious, you can find more on the UK dairy market outlook on ahdb.org.uk.
Your Essential Steaming Hardware
With your milk chilling in the fridge, let's get our hands on the hardware. Each tool has a specific job, and getting familiar with them is the first step.
-
A Stainless Steel Milk Pitcher: This is your best friend in the steaming process. A good quality steel jug is absolutely essential because it's a great conductor of heat, which means you can use your free hand to gauge the temperature as it rises. A sharp, well-defined spout is non-negotiable—it gives you the precision needed for a controlled pour and, eventually, beautiful latte art. Size is also key; a good rule of thumb is to choose a jug that’s roughly double the volume of milk you’ll be steaming, giving it plenty of room to expand.
-
A Powerful Steam Wand: The steam wand is the heart of the operation. Before every single use, you need to "purge" it—just a quick blast of steam to clear out any trapped water or old milk residue. Trust me, you don't want yesterday's milk in today's flat white. Whether your wand has one hole or four, the technique is what matters most.
-
A Thermometer: Look, I know seasoned pros often go by the feel of the jug, but when you're starting out, a thermometer is an invaluable guide. It takes all the guesswork out of the equation. Clipping one to the side of your jug helps you consistently hit that magic 55-65°C sweet spot where milk is perfectly sweet, without ever scalding it.
Choosing Your Milk Dairy vs Plant-Based
The milk you pour into that jug will completely change the game. From texture and taste to how it behaves under steam, every milk has its own personality. Whole cow's milk is the classic choice for a reason—its perfect balance of fat and protein makes for a forgiving, stable, and creamy microfoam.
But the world of plant-based milks has come a long way, and many of the "barista" editions available across the UK are absolutely fantastic. It's worth trying a few to see what you enjoy.
| Milk Type | Steaming Difficulty | Microfoam Quality | Best For |
|---|---|---|---|
| Whole Cow's Milk | Easy | Excellent, glossy & stable | Beginners, classic lattes & cappuccinos |
| Oat Milk (Barista) | Easy | Very Good, creamy & durable | Dairy-free drinkers who want a similar texture to whole milk |
| Soya Milk | Medium | Good, can be very stable | Those who enjoy its distinct flavour and high-protein foam |
| Almond Milk (Barista) | Hard | Fair, can be thin & separate | Experienced hands looking for a nutty flavour profile |
Ultimately, what works on my machine might behave slightly differently on yours. Part of the joy of making coffee at home is the experimentation.
Don't be afraid to play around! Grabbing a carton of a barista-grade oat milk is a brilliant place to start if you're exploring dairy-free options. It’s specifically designed to create a beautiful texture that holds up well for latte art.
Finding your favourite milk is a journey in itself. Each one offers a different experience, and discovering what you love is a core part of honing your craft as a home barista.
How to Create Silky Smooth Microfoam
Right, this is where the real magic happens. This is the moment we turn cold, everyday milk into that liquid velvet that makes a coffee truly special. It’s not about following a rigid set of rules; it’s a dance of sound, touch, and sight.
Think of it in two parts. First, we need to introduce air to aerate, or ‘stretch’, the milk. Then, we create a beautiful vortex to spin that air into a glossy, perfectly integrated microfoam. This is a sensory skill, so get ready to tune in, listen to the sounds, and feel the temperature change.
This quick illustration shows the very first thing you should always do: purge your steam wand. It's a simple step, but absolutely vital.
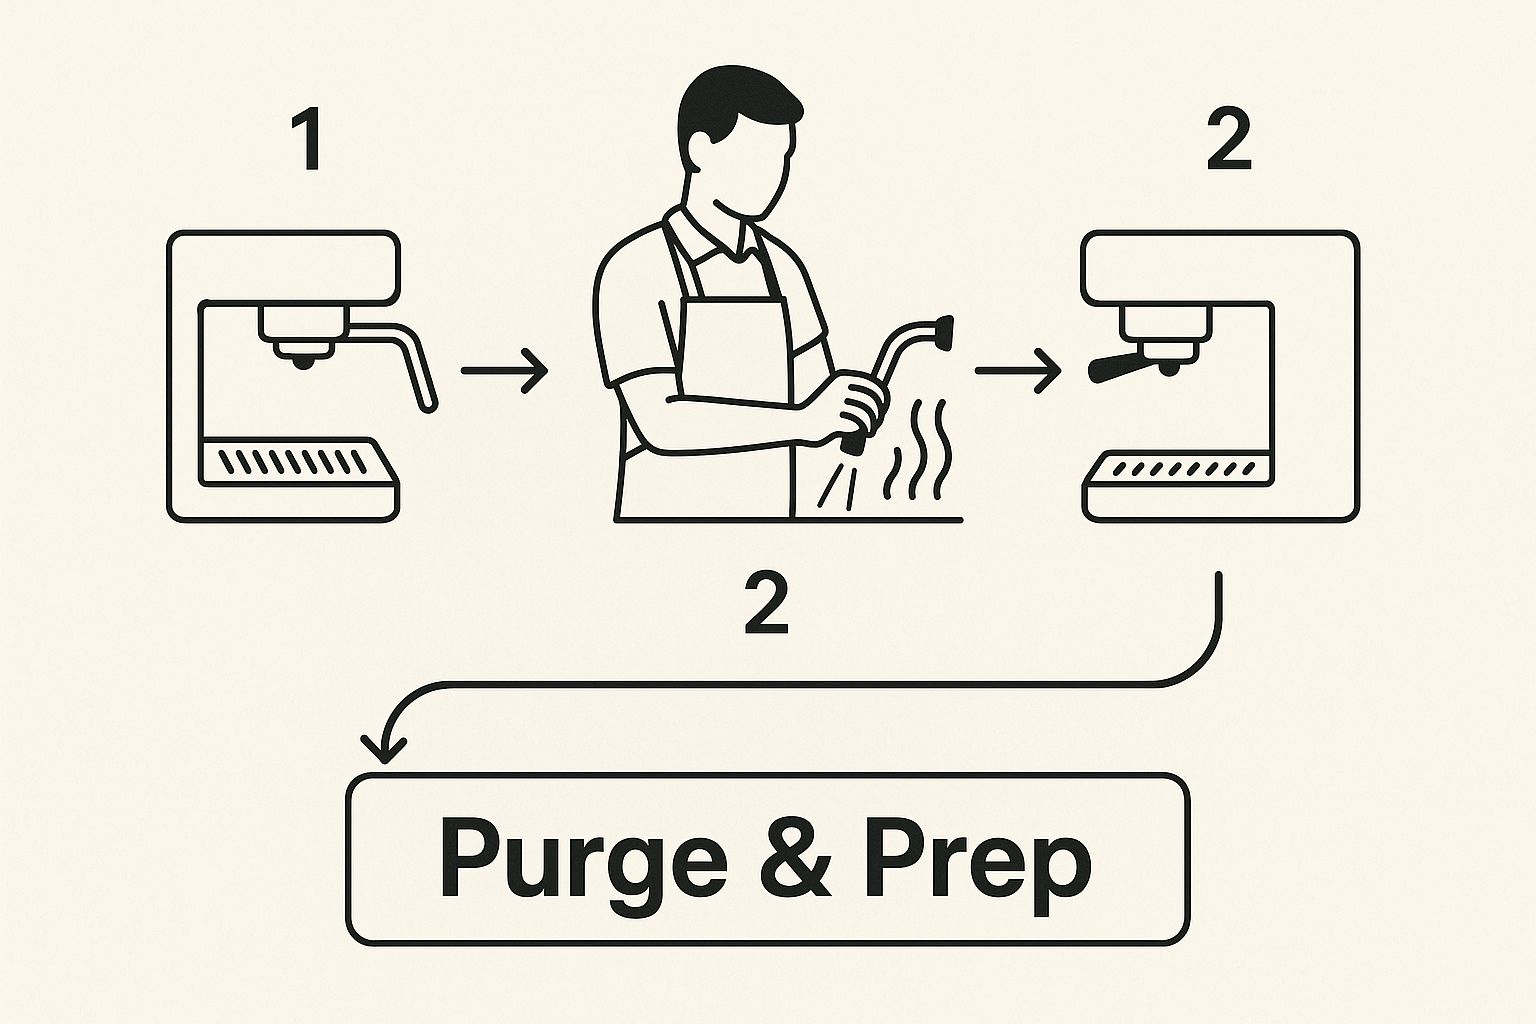
Starting with a clean, purged steam wand is non-negotiable. Any trapped water or old milk residue will ruin the sweet, pure flavour we’re aiming for.
The Aeration Phase: Introducing Air
This first stage is all about gently weaving air into the milk to create the foundation of our foam. The sound you’re listening for is a delicate, consistent ‘tss-tss-tss’—a bit like tearing paper. If you hear a loud, screeching shriek, the wand is too deep. Big, ugly gulping noises? The tip is too high, pulling in massive bubbles.
Grab your pitcher of cold milk. Position the steam wand so the tip is just sitting beneath the surface, placing it slightly off-centre. This positioning is key, as it sets you up perfectly to create the whirlpool in the next phase.
Now, open that steam valve all the way. Don't be timid! A full, powerful jet of steam is much easier to control than a weak, hissing one. You'll see the milk's volume start to grow as the air gets pulled in. This is the ‘stretching’ phase.
How long you stretch for really depends on the drink. For a flat white, you want silky, thin milk, so you’ll only need a few seconds of aeration. For a classic cappuccino with its signature dome of foam, you’ll need to stretch it for quite a bit longer.
Your goal is to get all the air you need incorporated before the milk gets too warm. A great cue is to stop aerating when the pitcher starts to feel lukewarm against your hand—roughly 37°C, or body temperature. The foundation is now set.
The Texturing Phase: Creating the Vortex
Once you’ve introduced enough air, it’s time to work it into the milk. We do this by creating a silent, swirling vortex. All you need to do is lower the steam wand a little deeper into the milk. That ‘tss-tss-tss’ sound should stop completely, replaced by a quiet, rolling hum.
This spinning motion is what does all the hard work. It folds those tiny air bubbles into the liquid, smashing any larger ones and creating that uniform, silky texture we’re after. The milk should be spinning beautifully in the pitcher. If it’s splashing about chaotically, just adjust the angle or depth of your wand until you find that sweet spot.
As the vortex spins, keep your other hand on the side of the pitcher. It’s your thermometer. The moment it becomes too hot to comfortably hold your hand there, turn the steam off. Immediately.
- The Sweet Spot: We’re aiming for a final temperature between 55–65°C.
- Why it Matters: This range is where the lactose (the natural sugars in milk) is at its absolute sweetest.
- Going Too Hot: Push past 70°C and you essentially ‘cook’ the milk. The proteins break down, the foam structure is destroyed, and you get a slightly flat, sulphurous flavour. No one wants that.
As soon as you switch off the steam, pull the wand out and give it a thorough wipe with a damp cloth. Follow that with another quick purge to blast out any milk from inside. Do this every single time.
Your milk should now look like fresh, wet paint—impossibly glossy, smooth, and with no visible bubbles.
Once you’ve mastered this, you’re ready to make a flat white like a pro barista. It's a drink that lives or dies by the quality of its milk, and now you have the secret. This technique is the cornerstone of almost every amazing coffee you've ever had.
Troubleshooting Common Milk Steaming Issues
Every home barista, no matter how passionate, has been there. That moment of pure frustration when the steam wand shrieks, the milk erupts into a bubbly mess, or it just sits there, flat and lifeless in the jug. Don't worry, this isn't a sign you've failed; it's practically a rite of passage.
Think of these little hiccups as your most valuable teachers on the journey to mastering milk. With a few simple tweaks, you can turn those frustrating attempts into genuine breakthroughs. Each problem has a cause, and more importantly, a fix.

Let's walk through the most common headaches you'll likely run into and get them sorted once and for all.
The Milk Is Screaming or Shrieking
We've all heard it—that high-pitched, ear-splitting scream is a classic beginner's mistake. It’s the sound of steam being violently forced deep into the milk without pulling any air in with it.
What’s happening is your steam wand is buried too far down in the jug right from the start. Instead of creating texture, the steam is just flash-heating the milk. The fix is simple: just lower your milk jug a touch, so the very tip of the wand is just below the surface. You're listening for that gentle 'tss-tss-tss' of air being drawn in, not a painful shriek.
Big, Soapy Bubbles on the Surface
You’ve finished steaming, and instead of a glossy, paint-like microfoam, you're looking at a collection of large, airy bubbles that belong in a bubble bath. This is what happens when you introduce too much air, too quickly.
This is usually caused by keeping the steam wand tip too high, essentially sitting on top of the milk instead of just beneath it. This pulls in huge gulps of air. To correct this, just submerge the wand a fraction more during that initial aeration phase. You want to whisper air into the milk, not shout it.
Sometimes, a few larger bubbles are unavoidable, even for seasoned pros. Don't panic. A firm tap of the jug on the counter, followed by a confident swirl, will often pop them and reintegrate the texture into a smooth, silky finish.
My Milk Is Too Thin and Watery
You've done the work, you go to pour, and… nothing. Your latte is just milky coffee. The milk has no body, no texture, and it vanishes into the espresso instantly. This is a tell-tale sign the milk wasn't stretched enough.
This simply means you didn't aerate for long enough at the beginning. You likely jumped from stretching the milk to creating the texturing vortex far too soon. Next time, keep that wand tip near the surface for a few more seconds. Listen for that gentle hiss and watch the volume grow just a little before you plunge the wand deeper to start the whirlpool.
My Milk Is Too Thick and Foamy
On the other end of the spectrum is milk so thick it plops out into the cup like a stiff dollop of meringue. This might be fine for an old-school cappuccino, but it’s a world away from the silky texture needed for a flat white or latte art.
This problem is the exact opposite of thin milk: you’ve aerated for way too long. By incorporating too much air, the texture has become stiff and dry. The solution is to dramatically reduce your aeration time. For a flat white, you might only need 1–3 seconds of that hissing sound before you dive the wand deeper to create the vortex. Remember, the longer you aerate, the thicker the final foam.
Milk Steaming Troubleshooting Guide
Sometimes you just need a quick reference to figure out what's gone wrong. This table is designed to help you quickly diagnose the issue and get back to making great coffee.
| The Problem (What you see/hear) | The Likely Cause | How to Fix It |
|---|---|---|
| A high-pitched screaming sound | Steam wand is too deep in the milk | Raise the wand tip so it's just below the surface during aeration |
| Large, dish-soap-like bubbles | Steam wand is too high/too much air introduced | Lower the wand tip slightly; aim for a gentle hiss, not a gulping sound |
| The milk is thin and has no texture | Not enough air was introduced (under-aerated) | Keep the wand tip near the surface for a few seconds longer at the start |
| The milk is stiff and overly foamy | Too much air was introduced (over-aerated) | Reduce aeration time significantly (1-3 seconds is often enough) |
| The milk isn't swirling (no vortex) | Poor wand position or angle | Reposition the wand off-centre and angle it to create a whirlpool effect |
| Milk tastes burnt or scalded | The milk was overheated (above 70°C) | Stop steaming earlier; use a thermometer or the 'hand-touch' method |
With a little practice, reading the signs and adjusting your technique will become second nature. Before you know it, you'll be fixing these issues on the fly without even thinking about it.
Pouring Your First Latte Art Designs
https://www.youtube.com/embed/JMmyvHoFlCQ
You’ve done the hard work. You’ve listened for the right sounds, felt the temperature climb, and created a jug of glossy, flawless microfoam. Now for the magic. It’s time to turn that liquid silk into something beautiful. This is the moment your coffee becomes a work of art.
But wait. Before a single drop touches that espresso, you need to 'groom' your milk. Every single professional barista does this, and it’s a non-negotiable step for getting a silky-smooth canvas to pour into.
It’s a simple two-part motion. First, give the base of the jug a firm, confident tap on the countertop. This will pop any large, pesky bubbles that might have lingered on the surface. Then, immediately start swirling the milk. You’re looking for it to develop a beautiful, uniform sheen, almost like wet paint. Keep that swirl going right up until the second you start to pour.
Preparing Your Canvas
With your perfectly groomed milk ready to go, take your cup—filled with a gorgeous shot of espresso—and tilt it towards you at a sharp angle. This creates a deep pool of coffee, which is absolutely vital for the first part of the pour.
Start pouring from a bit of a height. The idea is to let the steamed milk dive underneath the rich, dark crema, mixing with the espresso without leaving a mark on the surface. This is how you build the base of your drink, giving it that wonderfully integrated flavour and texture.
Once the cup is about half to two-thirds full, it’s showtime.
Bring the spout of your milk jug right down, almost touching the surface of the crema. As you do this, slowly bring the cup back to an upright position. Now, when you increase the flow of your pour, that brilliant white microfoam will glide onto the surface, creating your design.
A steady hand and a fluid motion are your greatest allies here. Don't be jerky or hesitant. A confident, smooth pour will always give you a better result, even if your first few designs are a bit abstract! Practice is what builds that crucial muscle memory.
Here in the UK, our love for a good coffee is undeniable, and that love is built on a foundation of well-steamed milk. With our national milk production hitting around 14.9 billion litres annually, a huge chunk of that goes into the lattes and flat whites we all enjoy. Considering a single latte can use up to 200 ml, the ability to steam milk perfectly is a skill at the very heart of our coffee culture. You can find more fascinating details about the UK milk market on statista.com.
Foundational Latte Art Patterns
Right, let's get to the fun part. We’ll start with three classic designs that are the building blocks for nearly every other pattern out there.
-
The Heart: This is where everyone begins, and for good reason. Once you're pouring close to the surface, focus on creating a stable white circle in the centre of the cup. As the cup fills, lift the jug slightly and pour a thin, straight line right through the middle of your circle. That final 'pull-through' motion is what magically draws the circle into a classic heart shape.
-
The Tulip: Feeling good about the heart? The tulip is the natural next step. You essentially stack your pours. Start by making a small circle, then stop pouring for a split second. Gently push that first circle forward by pouring another one just behind it. You can do this two, three, or even more times. For the finish, do exactly what you did for the heart: lift the jug and pull through the centre of your stack.
-
The Rosetta: Okay, this one is a bit more advanced, but it’s incredibly satisfying once you get the hang of it. Start pouring a thin stream at the back of the cup (the side furthest from you). As soon as the white foam appears, start a gentle side-to-side wiggle with your wrist while slowly moving the jug backwards across the cup. This rocking motion creates those beautiful, layered leaves. To finish it off, lift the jug high and pull a straight line all the way through your design, giving it a stem.
Your Milk Steaming Questions Answered
Even with the best technique, there are always little hurdles on the path to perfect coffee. We've heard plenty of questions from home baristas across the UK, so let's tackle a couple of the most common ones and build on what you've learned.
Why Does My Milk Foam Separate?
It’s a classic, frustrating scenario. You’ve just steamed what looks like a beautiful jug of milk, but when you go to pour, it’s separated into watery, hot liquid and a stiff clump of foam on top. It’s a latte artist’s nightmare.
This usually boils down to one of two things: you've either overheated the milk or let it sit for too long. Pushing it past 65°C is a sure way to make the proteins give up, and they'll no longer be able to hold that lovely microfoam structure together. On the other hand, leaving the jug on the side for more than 10-15 seconds gives gravity a chance to pull the foam and liquid apart.
The key is to move with purpose. Keep that milk swirling in the jug right up until the moment you pour.
Think of your steamed milk as having a very short lifespan. The moment it's ready, it's time to pour. That seamless integration with the espresso is what you're aiming for, and timing is everything.
Can I Re-Steam Milk?
It’s tempting to try and save milk you’ve already heated, I get it. Waste not, want not. But when it comes to steaming, the simple, hard answer is no.
Once milk has been heated, its protein structure is permanently changed. Trying to steam the milk a second time just won't work—you'll end up with a flat, lifeless texture and a pretty unpleasant, cooked flavour that will ruin your coffee.
For that sweet, creamy taste and the silky texture that makes a coffee truly special, you have to start with fresh, cold milk straight from the fridge. Every single time.
Ready to put your new skills to the test with beans that deserve perfectly steamed milk? Ue Coffee Roasters offers a curated selection of speciality single origins and blends, ethically sourced and roasted with passion in the Cotswolds. Explore our coffee and elevate your home brewing at https://www.uecoffeeroasters.com.